
I spent a little time yesterday rehabbing 3 pairs of jeans for the boys (2 for Nolan and 1 for Griffin).
Here are the finished products:

Now I'll walk you through them one at a time.
1. The Diamond Knee
You may remember when I put some cute shaped no-sew patches on Nolan's jeans. Well, once they went through the washer and dryer, the edges started to peel back just slightly. Then Nolan thought picking at the patches was the best way to entertain himself at school. The result was this:

I started just by ironing the patch flat. Then I removed the front compartment of my sewing machine, leaving the narrow sewing arm.

I wrestled the jeans leg onto the sewing arm and maneuvered the jeans until I could sew the patch on. I had to sew two sides (backstitching at the beginning and end) and then remove the jeans and insert them the other way (ankle first to sew 2 sides of the diamond, then waist first to sew the other two sides) to sew the other two sides of the patch.

Now these should last! The first time I patched these, they were Nolan's. Now they get a second life in Griffin's wardrobe.

2. The Decorative Stitched Knee
One of Nolan's pairs of jeans had a smaller hole than the other. First, I trimmed all the loose, hanging threads.

Then I cut a rectangle of denim from an old pair of Jared's jeans (which I keep specifically for this purpose).

I cut two strips of Stitch Witchery (fusible web) just smaller than my rectangle of denim.


Then I turned the jeans inside-out. I placed the strips of Stitch Witchery on either side of the hole and then covered those with the scrap of denim (right side facing down).

Then I ironed over the patch to fuse the patch to the jeans. I turned the jeans right-side-out and ironed from the front as well.
I headed back to my sewing machine and shoved the jeans leg over my sewing machine so I could sew over the narrow hole.
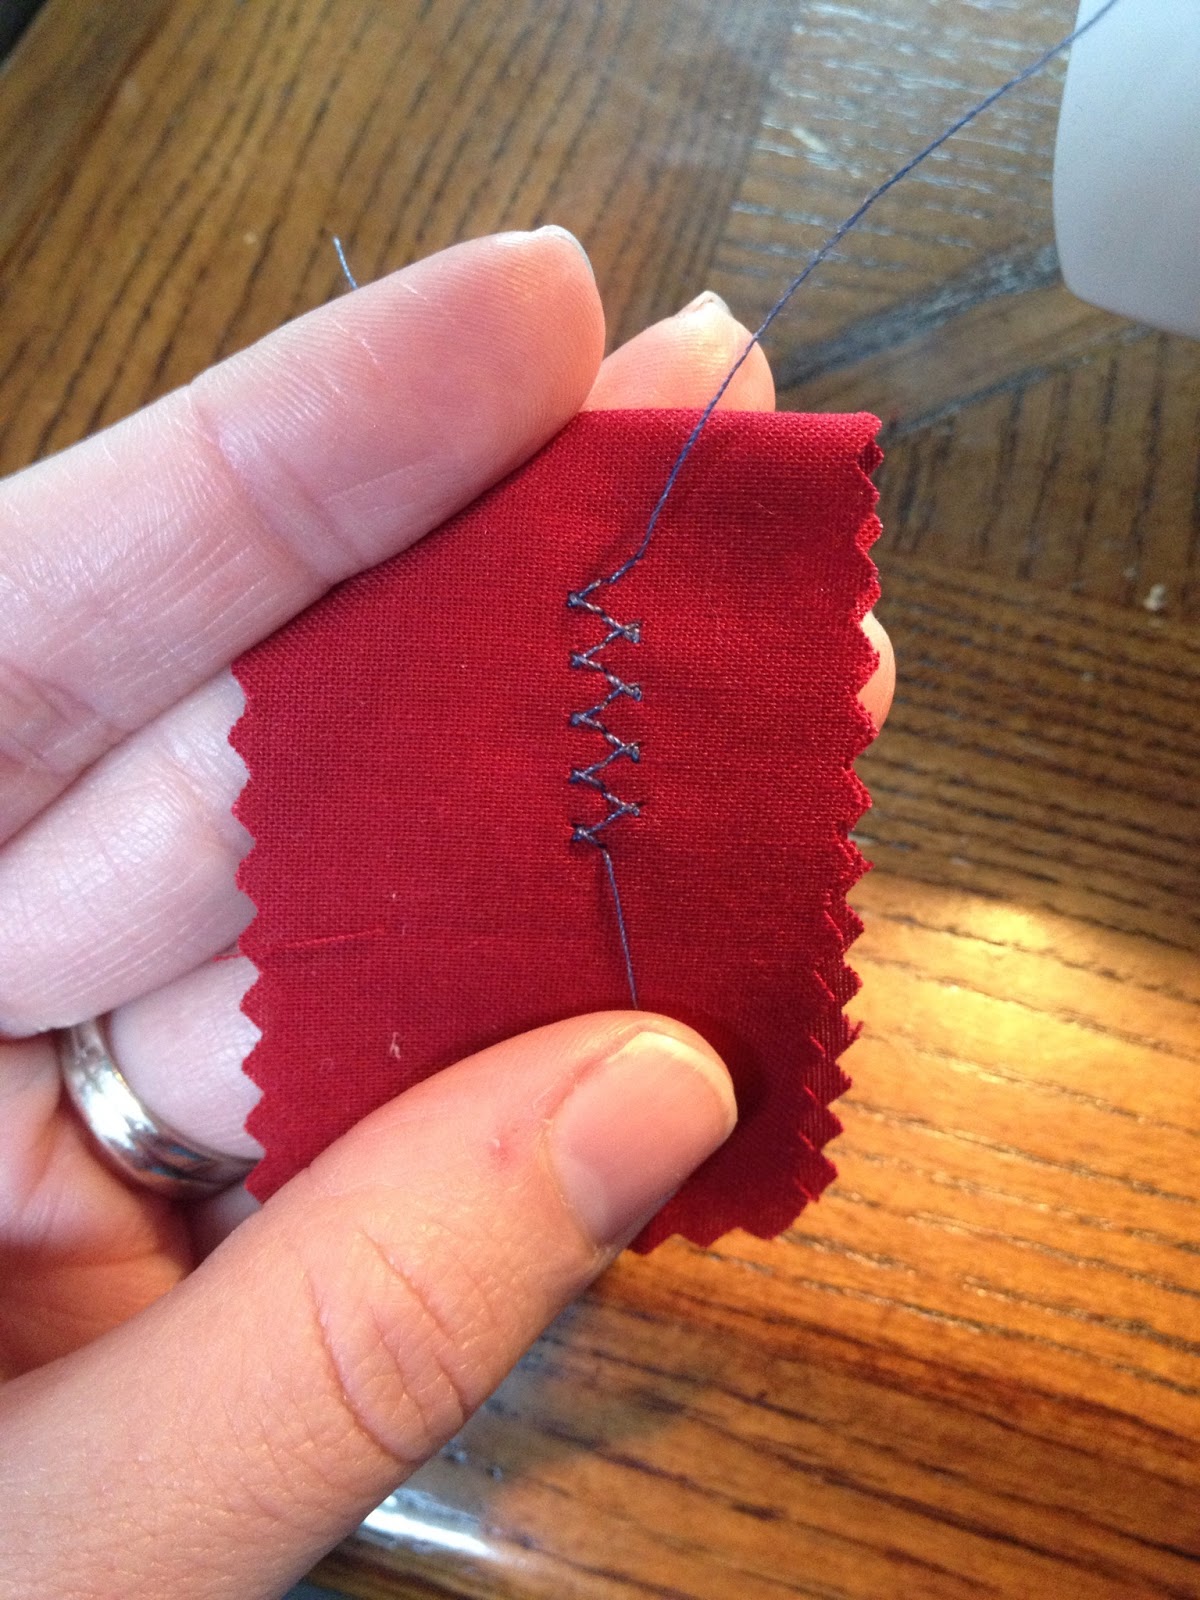
I chose a decorative stitch. Here's a sample I sewed on a fabric scrap so I could get the width and length right:
I stitched two rows of decorative stitching over the hole in the knee of the jeans.
I want to show you the trick I used for tying off my threads. I didn't want to backstitch at the beginning and end of my stitching because it would be very obvious and not visually appealing with the decorative stitch. Rather than backstitching, I left a few inches of thread at the beginning and end of each row of stitching.
First, I inserted an empty sewing needle through the top of my project until just the eye of the needle was above the project. Then I threaded my upper thread through the eye of the needle and pulled it through to the back of the project. I did this with all four top threads (at the beginning and end of each row of stitching). Then I flipped the jeans inside-out so I could work from the back of the stitching.


I had also left a few inches of bobbin thread at the beginning and end of each row of stitching. So now I had 8 threads on the back of my project: 4 top threads and 4 bobbin threads. Another way to look at it is 4 pairs of threads (each pair being one top thread and one bobbing thread). I tied each pair of threads a few times to form knots and trimmed the excess thread close to the knots.


Voila!

It would be fun to do this method with various thread colors and different decorative stitches.
3. The Monster Knee
My friend had told me about this idea from Pinterest:

I looked at the picture and made my own version.
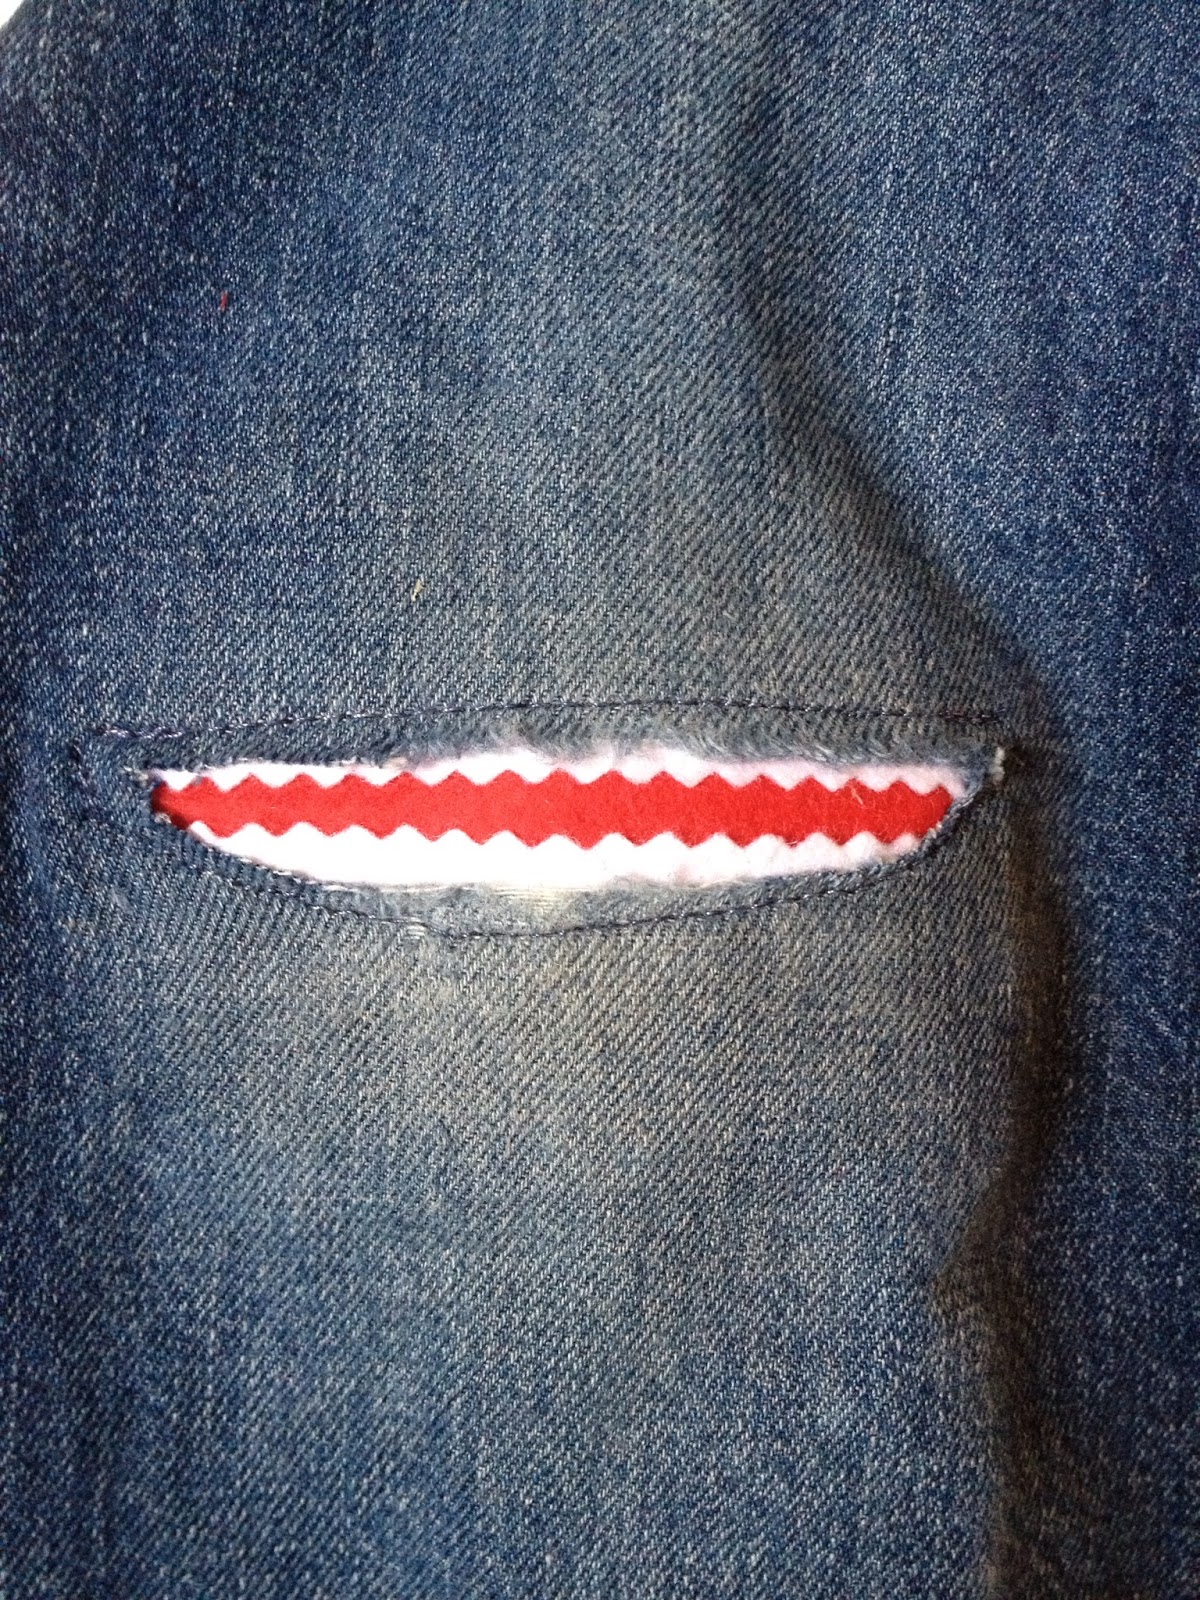
This pair of Nolan's jeans had a much larger hole:

I trimmed the long, loose threads (before I took the picture above). I tried to iron it flat, but it was a little stretched out and wouldn't quite lay flat.
I cut out a rectangular scrap of red fleece (leftover from Griffin's Sonic costume) large enough to cover the hole.
Then I used my pinking shears to cut some white felt for the monster's teeth.

After dry fitting the teeth in the hole, I decided I wanted two rows of teeth.

I used strips of Stitch Witchery to adhere the white felt teeth to the red fleece background.

Then I used Stitch Witchery to fuse the red fleece to the inside of the pant leg, carefully lining up the teeth in the hole.


Then I wrestled the jeans onto my trusty sewing machine so I could sew around the hole/mouth. I sewed one line of stitching across the top of the mouth (backstitching to begin and end). Then I sewed another line of stitching around the bottom of the mouth. It was a little tricky to curve the stitching at the sides of the mouth since the pant leg was a tight fit around the sewing machine arm.


The finished monster mouth:
For the eyes, I cut a medium circle out of white felt and two smaller circles out of black felt. I hand-sewed one black circle onto a white circle first (for the larger eye). Then I hand-sewed both eyes onto the jeans because I knew I could never maneuver the jeans around to sew in a circle.
Nolan's jeans monster:

Nolan loved it! He wanted to wear them to school right away. At the end of the day, he reported that he really liked the way the soft fleece felt against his knee. He told me that for one whole day he forgot he has a scrape on that knee. :) "They feel better than when they didn't even have a hole."
There you have it. Three ways to mend kids' jeans.


I'm sure this problem will continue in my household, so I'll continue to find creative ways to mend jeans knees!
Jessica
No comments:
Post a Comment