Friday, January 25, 2013

Kids' Jeans Rehab 3 Ways

Nice jeans are a hot commodity in my house.  Jared and I rarely spend money on our own clothes, and my kids seem to be just more than the knees of jeans can handle.

I spent a little time yesterday rehabbing 3 pairs of jeans for the boys (2 for Nolan and 1 for Griffin).

Here are the finished products:


Now I'll walk you through them one at a time.

1.  The Diamond Knee

You may remember when I put some cute shaped no-sew patches on Nolan's jeans.  Well, once they went through the washer and dryer, the edges started to peel back just slightly.  Then Nolan thought picking at the patches was the best way to entertain himself at school.  The result was this:


I started just by ironing the patch flat.  Then I removed the front compartment of my sewing machine, leaving the narrow sewing arm.


I wrestled the jeans leg onto the sewing arm and maneuvered the jeans until I could sew the patch on.  I had to sew two sides (backstitching at the beginning and end) and then remove the jeans and insert them the other way (ankle first to sew 2 sides of the diamond, then waist first to sew the other two sides) to sew the other two sides of the patch.


Now these should last!  The first time I patched these, they were Nolan's.  Now they get a second life in Griffin's wardrobe.


2.  The Decorative Stitched Knee

One of Nolan's pairs of jeans had a smaller hole than the other.  First, I trimmed all the loose, hanging threads. 


Then I cut a rectangle of denim from an old pair of Jared's jeans (which I keep specifically for this purpose).

 
I cut two strips of Stitch Witchery (fusible web) just smaller than my rectangle of denim.


Then I turned the jeans inside-out.  I placed the strips of Stitch Witchery on either side of the hole and then covered those with the scrap of denim (right side facing down).


Then I ironed over the patch to fuse the patch to the jeans.  I turned the jeans right-side-out and ironed from the front as well.

I headed back to my sewing machine and shoved the jeans leg over my sewing machine so I could sew over the narrow hole.

I chose a decorative stitch.  Here's a sample I sewed on a fabric scrap so I could get the width and length right:
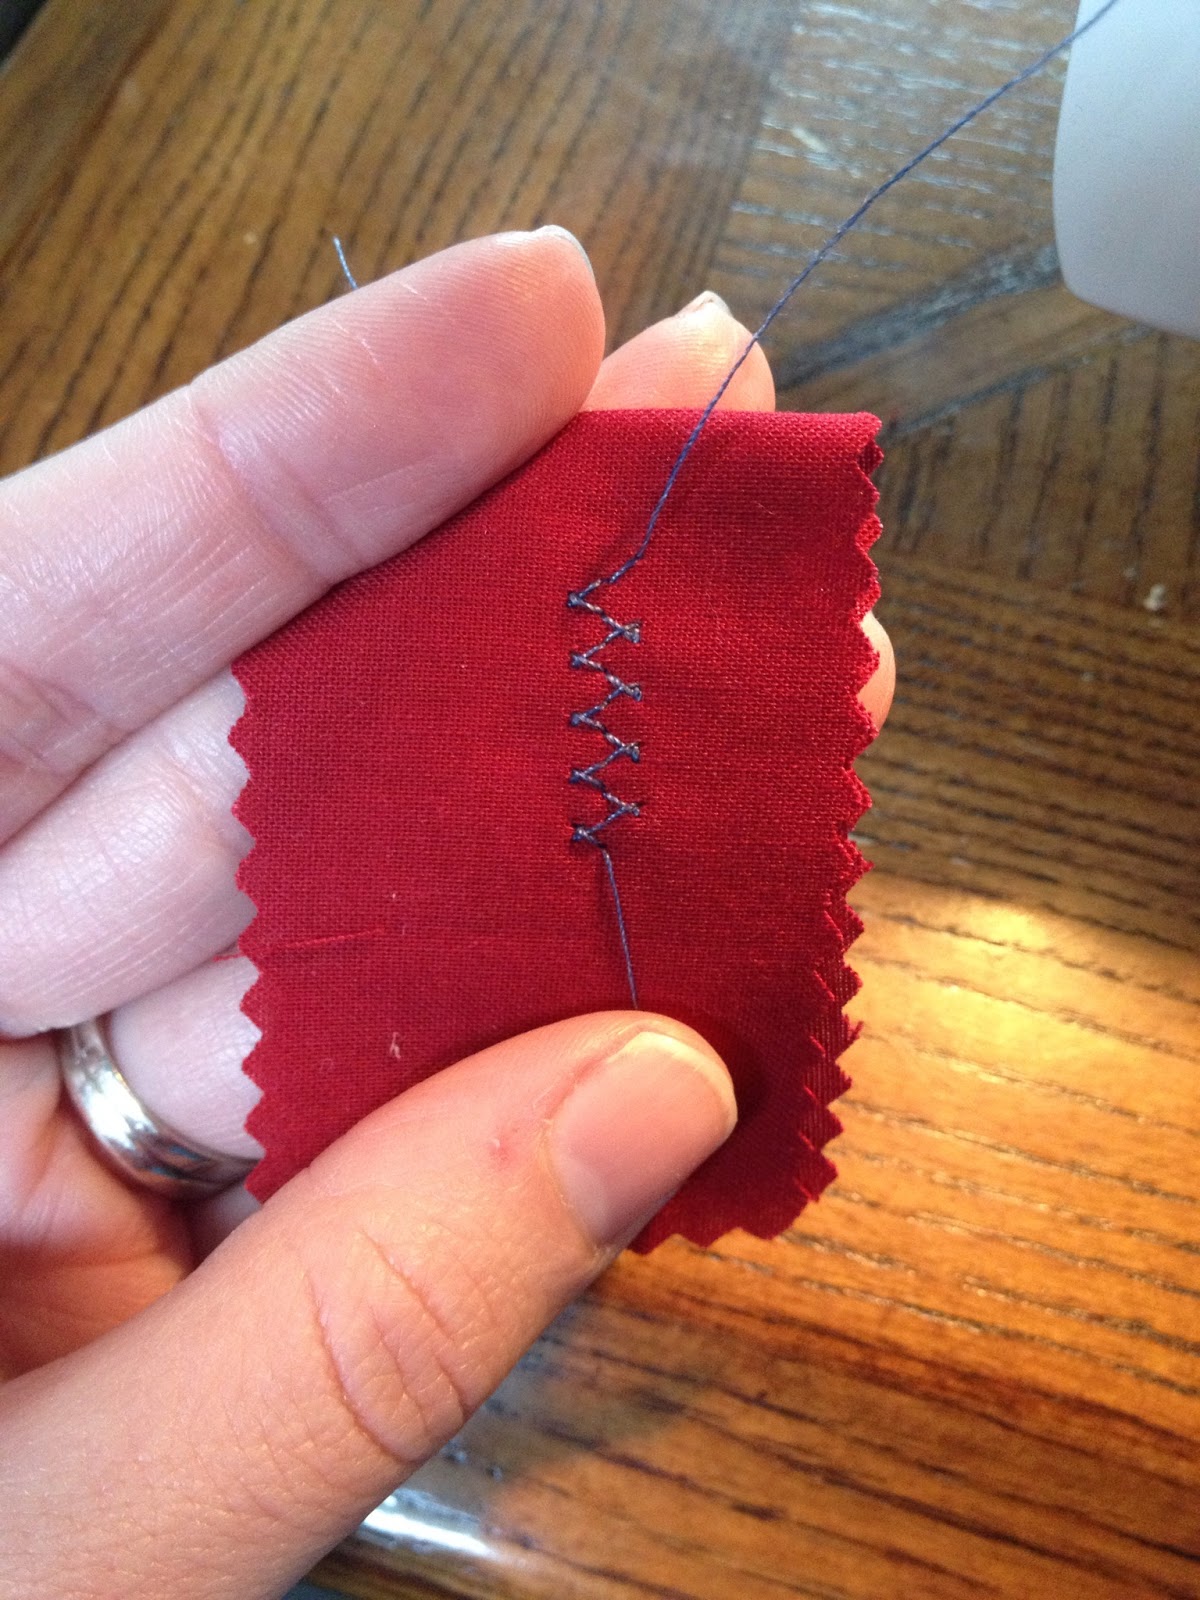

I stitched two rows of decorative stitching over the hole in the knee of the jeans. 

I want to show you the trick I used for tying off my threads.  I didn't want to backstitch at the beginning and end of my stitching because it would be very obvious and not visually appealing with the decorative stitch.  Rather than backstitching, I left a few inches of thread at the beginning and end of each row of stitching.

First, I inserted an empty sewing needle through the top of my project until just the eye of the needle was above the project.  Then I threaded my upper thread through the eye of the needle and pulled it through to the back of the project.  I did this with all four top threads (at the beginning and end of each row of stitching).  Then I flipped the jeans inside-out so I could work from the back of the stitching.


I had also left a few inches of bobbin thread at the beginning and end of each row of stitching.  So now I had 8 threads on the back of my project:  4 top threads and 4 bobbin threads.  Another way to look at it is 4 pairs of threads (each pair being one top thread and one bobbing thread).  I tied each pair of threads a few times to form knots and trimmed the excess thread close to the knots.


Voila!


It would be fun to do this method with various thread colors and different decorative stitches.

3.  The Monster Knee

My friend had told me about this idea from Pinterest:


I looked at the picture and made my own version.

This pair of Nolan's jeans had a much larger hole:


I trimmed the long, loose threads (before I took the picture above).  I tried to iron it flat, but it was a little stretched out and wouldn't quite lay flat.

I cut out a rectangular scrap of red fleece (leftover from Griffin's Sonic costume) large enough to cover the hole. 

Then I used my pinking shears to cut some white felt for the monster's teeth.


After dry fitting the teeth in the hole, I decided I wanted two rows of teeth. 


I used strips of Stitch Witchery to adhere the white felt teeth to the red fleece background.


Then I used Stitch Witchery to fuse the red fleece to the inside of the pant leg, carefully lining up the teeth in the hole.


Then I wrestled the jeans onto my trusty sewing machine so I could sew around the hole/mouth.  I sewed one line of stitching across the top of the mouth (backstitching to begin and end).  Then I sewed another line of stitching around the bottom of the mouth.  It was a little tricky to curve the stitching at the sides of the mouth since the pant leg was a tight fit around the sewing machine arm.


The finished monster mouth:
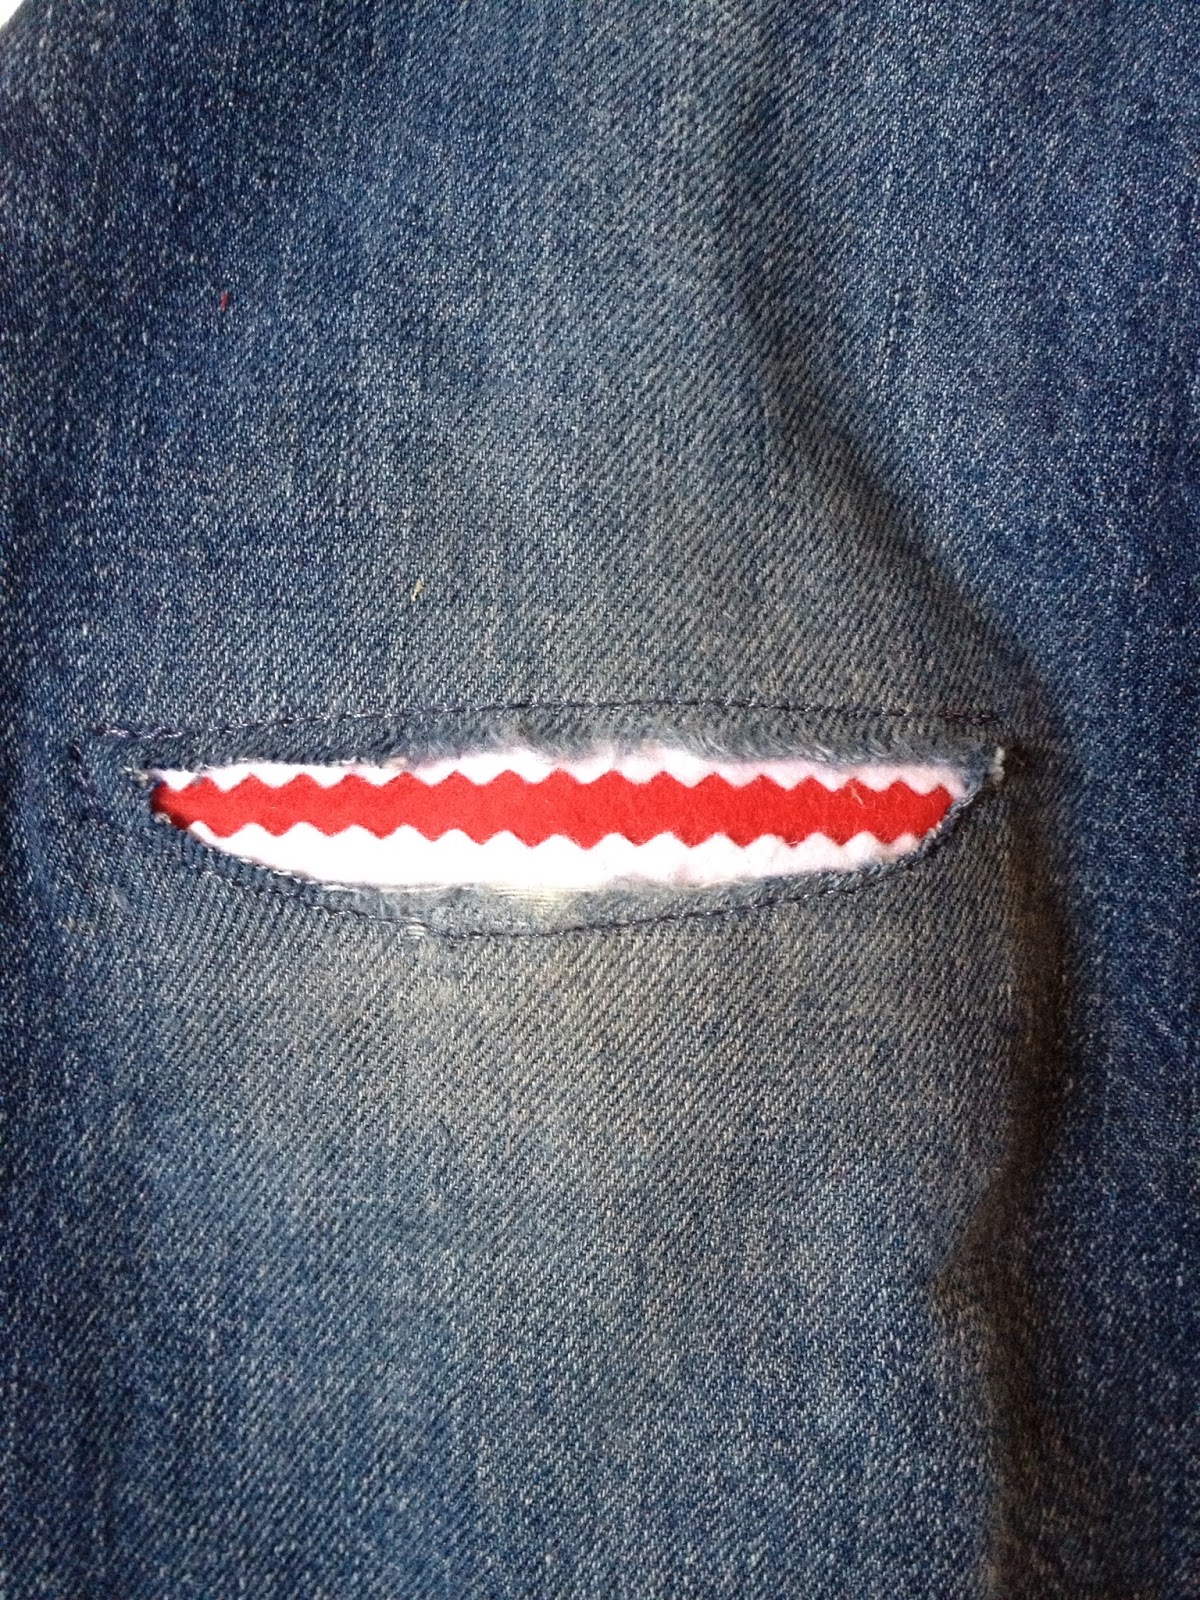

For the eyes, I cut a medium circle out of white felt and two smaller circles out of black felt.  I hand-sewed one black circle onto a white circle first (for the larger eye).  Then I hand-sewed both eyes onto the jeans because I knew I could never maneuver the jeans around to sew in a circle.

Nolan's jeans monster:


Nolan loved it!  He wanted to wear them to school right away.  At the end of the day, he reported that he really liked the way the soft fleece felt against his knee.  He told me that for one whole day he forgot he has a scrape on that knee. :)  "They feel better than when they didn't even have a hole."

There you have it.  Three ways to mend kids' jeans. 


I'm sure this problem will continue in my household, so I'll continue to find creative ways to mend jeans knees!

Jessica


Free Printables: The New Perfect

I'm still trying to figure out how to publish a downloadable free printable.  We'll see if this method works.

If you didn't already know, I struggle with perfectionism.  After I recently told my husband that I don't know how to lower my expectations, I thought about putting up some sort of reminder for myself.  So I created these:


Then I decided to make another set with a different word, inspired by my current obsession with the song "Redeemed" by Big Daddy Weave.


Click here to download these printables for free.  Enjoy!

Jessica

Monday, January 21, 2013

Control

I receive daily devotions via email from Proverbs 31 Ministries (which I highly recommend, by the way).

This morning's devotion is called "Who Controls What?" and it talks about how God's original plan was for him to control the world and for us to control ourselves.  The author is mostly speaking about self-control.

But it got me thinking.  I've been doing a lot of thinking lately, mostly because I'm having such a hard time with this darn perfectionism and letting other people's words/actions sink in a little too deeply.

So I started thinking about what God controls and what I control.  I'm a list girl, so I started making two lists.  These are personal, but that's exactly the sort of thing I share here.  I wish I could post these side by side so you could see which items are related, but I think you can connect certain ones just because you're smart.

Things I Can't Control:
  • The genetic makeup of my body
  • People's reactions to my kids
  • What people think of my parenting
  • Who my kids are
  • What people think of me (My cousin told me, "What other people think of you is none of your business.")
  • Jared's income (which is our family's income)
  • Jared's travels for work
  • God's plan for me and my family
  • What people say to me

Things I Can Control:
  • What I eat
  • How much I exercise
  • How I parent
  • What I teach my kids
  • How I react to my kids
  • How we spend money
  • My attitude about Jared's travels
  • How much I pray
  • My study of the Bible
  • What I say to other people

I'm still prayerfully thinking about these lists and asking God to help me see which category various aspects of my life belong in.  For me, it's important to make this distinction so I can focus on things I can actually change. 

I know this isn't an earth-shattering concept.  But actually writing the lists is a helpful step for me and might be for you too.  The lists give us an idea of how to make a difference with our time and energy.

This exercise reminded me of the Serenity Prayer.  I know everyone knows it, maybe even to the point of it being trite.  I personally have a beautiful version of it (made by my great-grandma) hanging in my family room.

 
Overused or not, it's a helpful prayer.  I'm called to control the things on my list and surrender the things on God's.  I only have enough time and energy to work on the things God puts on my list.  No wonder I'm so exhausted:  I've been working on God's list!

Jessica

Thursday, January 17, 2013

Lasagna Cups

Here's a very easy dinner idea I wanted to share with you.

I was inspired by a recipe I found a while back, but the link doesn't seem to be working anymore.  I basically took the idea but made it way easier and adapted it for my family.


Ingredients:
  • 1 package small square wonton wrappers*
  • 1 lb. ground beef (you don't actually need the full amount)
  • 1 jar spaghetti sauce (you'll only use about 1/3-1/2 of the jar)
  • 1 small container cottage cheese
  • 1-2 cups shredded mozzarella (depending on your preference)
  • Parmesan, shredded or grated (optional)
*If you haven't used wonton wrappers before, they look like this:

At Walmart, they are located near the produce where there's a wall of refrigerated shelves.  They are next to the tofu (at my local store anyway).  At my other regular grocery store (Kroger), they are in the organic refrigerated section (just past the deli).  They come in small squares, large squares, and small circles.  I use them for several recipes.  For this recipe, I recommend these small square ones.

Directions:
  1. Preheat oven to 375.
  2. Brown the ground beef in a skillet, breaking into small bits.
  3. Spray a 12-cup muffin tin with non-stick spray.
  4. Place one wonton wrapper in each muffin cup, gently pressing it down to line the bottom (and part of the sides) of each cup.
  5. Spoon a small amount (about 1 tablespoon or slightly less) of cottage cheese into the bottom of each wonton wrapper.
  6. Cover cottage cheese with a bit of the ground beef.
  7. Spoon spaghetti sauce over beef layer.
  8. Sprinkle mozzarella over sauce.
  9. Press another wonton wrapper on top of each layered cup.  I like to rotate the second wrapper so the corners of the square wrapper line up in between the corners of the bottom wrapper (did that make sense?).  Press enough that this second wrapper has the general cup shape.
  10. Repeat the layers once more:  cottage cheese, ground beef, sauce, mozzarella.  If you would like, add a bit of Parmesan on the very top.
  11. Bake for about 10 minutes, or until heated through and corners of wonton wrappers are brown.
Here's a visual of how it all goes down:


(You may have noticed that I made one lasagna cup different.  Griffin doesn't like spaghetti sauce, so I just skipped that layer on his lasagna cup.)

These are yummy and easy.  You could try all sort of variations, like substituting Italian sausage for ground beef or ricotta for cottage cheese.  You can even take the idea and make it Mexican by using taco seasoning with the ground beef, changing the cheese, eliminating the cottage cheese and spaghetti sauce (obviously), and adding your favorite taco/fajita toppings.

Enjoy!

Jessica