Sunday, August 19, 2012
Vacation: Take Three
Ok, in the last 24 hours I have written two full blog posts and mentally composed several more, but I ultimately determined that each of these posts was sub-par, and I haven't published any of them.
I just got home from a vacation with my family. I have a billion pictures to possibly share. God has been at work, and there's lots I could write on that subject. My larger family unit reached a life-changing bend in the road last week. I have lots to share and just can't quite get happy with how to organize my thoughts.
I can't let my perfectionism win here.
So here's what we're going to do. I'm going to lay out the facts. Then we're all going to pretend that it was cleverly written. And that I included entertaining stories and anecdotes. And that I chose great photographs to show you. Agreed? Great.
Here we go.
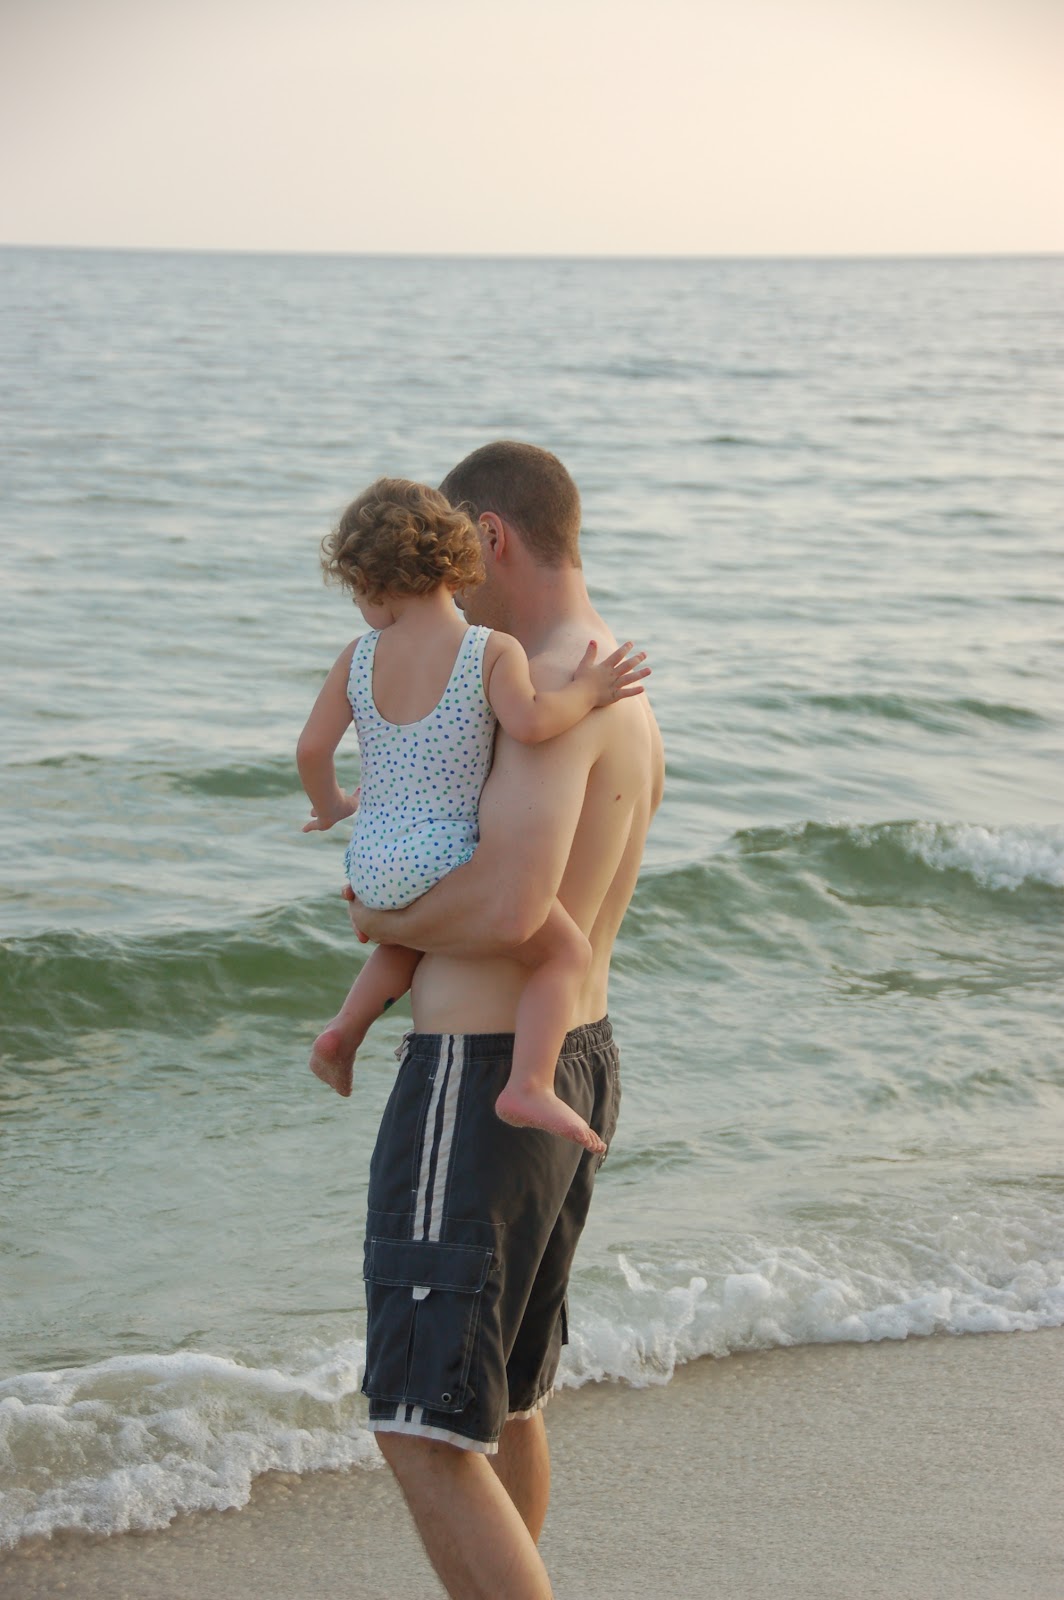
We spent 8 days in Gulf Shores, Alabama. We flew with three small children, including changing planes in Dallas, and we all survived. So did the other passengers.
We did all sorts of family activities that would normally be too overwhelming or scary for me, but I pushed myself for the sake of family fun.
We went to the beach, swam in the pool (with obnoxious teenagers and two bratty children who kept taking my kids' toys), played miniature golf, rode a bunch of kiddie rides, went to an arcade, rode a giant ferris wheel as a family, went to Build-A-Bear for the first time (and it was awesome!), tried different ice cream joints in the evenings, bought overpriced souvenirs, and ate at tons of new restaurants.
We all got sunburned one day. It's a requirement of any vacation we take. At least it was close to the end of our trip, and we were able to do non-swimming activities the next day so everyone could heal.
Jared and I found a new show we're addicted to watching after the kids are in bed. It's on Netflix, and it's called "Lie to Me." It's fascinating and entertaining, and I enjoy it like I used to enjoy CSI before it got too gory and edgy and I had to stop watching it.
We stayed on the 13th floor of our condo. Even though I had had nightmares (literally) about horrible things happening that high off the ground, it really didn't bother us once we were there. And, no, we are not superstitious about staying on the 13th floor.
I ate tons of junk food and fried food. I gained back a few of those pounds I worked so hard to lose. Weight goes on so much easier--and faster--than it comes off!
I read "The Rescue" by Nicholas Sparks, and I loved it.
We rented the nicest minivan ever. I believe it was a 2012 Chrysler Town & Country. It had leather seats, automatic doors, a back-up camera, basically a computer in the dashboard, more cargo space in the back than I thought possible, and the individual seats in the middle could fold up and hide completely in the floor so the boys could climb right to the back seat and we had storage space too. We were in love. Unfortunately, we will NEVER be able to afford one for ourselves. It still enhanced the vacation experience!
We also enjoyed luxuries like having two bathrooms in the condo.
The kids watched "The Lorax" every day. Before bed, they read the book "The Lorax."
We checked 5 suitcases and 3 car seats at the airport, and all items landed safely at our destination without any problems. Same story on the way home.
We went crab hunting at night on the beach. We didn't see one single crab. Ever. That was disappointing for the kids because they each had their own net and their own special head lamps/flashlights and were super excited for crab hunting.
Griffin made a friend. It was a breakthrough for him and a very proud moment as his mom. It was a little girl named Addison, and Griffin told me, "She's four like me." They swam in the pool together, and Griffin made sure she followed the rules that her "Granny" laid out for her. It was so cute!
I shot a hole-in-one at a volcano-shaped hole while playing mini golf. I'm usually fairly terrible at it. Jared and I actually tied, which is huge for me since he's good at mini golf.
On our last day at the beach, we paid the ridiculous fee to rent two beach chairs and an umbrella (all set up by the young beach attendant). We felt like celebrities in our comfy, shaded spot. Plus my pink skin needed a break from the sun.
Now that we're back home, we have to get ready for school starting next week. Nolan starts first grade on Thursday. He didn't get the teacher he wanted, and none of his friends from last year are in his class. Luckily, there's a girl in his first grade class who was in his preschool class. Even though she's a girl (you know how they are at this age), he's happy to have a friendly face.
And now, I'm going to show you some of the many, many pictures I took on vacation. I'm not even going to put captions on any of them. It'll be more fun that way.
Doesn't that look like good old-fashioned family fun?
Jessica
Monday, August 6, 2012
Homemade Christmas Gifts
I realize it's still summer, but believe it or not, I actually start thinking about and working on homemade Christmas gifts in the middle of the summer. This summer I've been too busy doing all sorts of activities with my kids, so I haven't started working on Christmas gifts yet.
Several years ago, our finances were so tight that there just wasn't any way to buy Christmas gifts for our loved ones. So I challenged myself to make as many gifts as possible. They were well-received, and I've kept up the tradition.
The very first homemade Christmas year was when I first discovered the craft trend of freezer paper stenciling. You can search the internet and find thousands of ways crafters have used this technique. Basically, you cut out a design from the freezer paper, iron it onto a shirt or a tote bag or a baby onesie, paint over the design, and then peel away and discard the freezer paper stencil.
For my first homemade Christmas, I made most of my family members shirts or bags using freezer paper stenciling. I took one basic idea/technique and personalized it for each recipient. In the years since then, I have branched out to a much larger variety of craft ideas to cover my Christmas gift list. I still make similar gifts for groups (like the grandparents, nephews, nieces, or a particular group of friends).
I get inspired by browsing blogs for homemade gift ideas. I love the tutorial round-ups at Sew Mama Sew! Click here for the 2011 Handmade Holidays List. (It also has links to previous years' lists.)
This is going to be quite frustrating for me this year as I'll be working on handmade gifts during any free time I can find, and I'll want to blog about them, but some of my readers are also recipients on my list!
Since I can't tell you what I'm making this year, I'll show you some of the homemade gifts I've made in the past. I didn't really take any pictures of the actual gifts I made, but I'm happy to provide links to the tutorials I used to make gifts for my loved ones. These are just some that I could remember over the last few years.
Jared's dad and grandma both requested this to be their repeated Christmas gift. They wash their jars and return them to me whenever they eat a pie. The jars are always handed to me with a smile and a passive comment about me needing to refill the jar with another pie.
The pies in jars are especially good for single people as they can have a full home-cooked dinner without tons of leftovers. But these are also great for busy families who would appreciate being able to throw several pies into the oven and have a hot meal.
If you're interested in making pies in jars, please learn from my endless hours of searching for the right jars. You can occasionally find them on Amazon, but you'll pay as much in shipping as you'll pay for the jars. The best deal is to purchase them from Ace Hardware online and choose free shipping to your local store.
If you've never made any homemade gifts, I highly encourage you to try. I bet you can find something that you can make, no matter what your skills are. Everyone has some talent to share, and you might as well tap into what your strongsuits are. And if you start now, you'll thank yourself in December!
Several years ago, our finances were so tight that there just wasn't any way to buy Christmas gifts for our loved ones. So I challenged myself to make as many gifts as possible. They were well-received, and I've kept up the tradition.
The very first homemade Christmas year was when I first discovered the craft trend of freezer paper stenciling. You can search the internet and find thousands of ways crafters have used this technique. Basically, you cut out a design from the freezer paper, iron it onto a shirt or a tote bag or a baby onesie, paint over the design, and then peel away and discard the freezer paper stencil.
For my first homemade Christmas, I made most of my family members shirts or bags using freezer paper stenciling. I took one basic idea/technique and personalized it for each recipient. In the years since then, I have branched out to a much larger variety of craft ideas to cover my Christmas gift list. I still make similar gifts for groups (like the grandparents, nephews, nieces, or a particular group of friends).
I get inspired by browsing blogs for homemade gift ideas. I love the tutorial round-ups at Sew Mama Sew! Click here for the 2011 Handmade Holidays List. (It also has links to previous years' lists.)
This is going to be quite frustrating for me this year as I'll be working on handmade gifts during any free time I can find, and I'll want to blog about them, but some of my readers are also recipients on my list!
Since I can't tell you what I'm making this year, I'll show you some of the homemade gifts I've made in the past. I didn't really take any pictures of the actual gifts I made, but I'm happy to provide links to the tutorials I used to make gifts for my loved ones. These are just some that I could remember over the last few years.
Cart Caddies for several female family members
Various fabric bowls/trays for my mom and sister:
An iPad Cover for my husband
My mother-in-law LOVES decorating for holidays, so I used this tutorial and seasonal fabric to make her tissue box covers for every major holiday plus all four seasons.
Portable Fabric Dollhouse (I made one of these for my niece.)
Sticky Note Notebooks for stocking stuffers or gift add-ons
Paint Sample Mini-Notebooks for stocking stuffers
Some of you may remember that 4 of my friends and I exchange shoes for each other's birthdays. We also exchange homemade or semi-homemade Christmas gifts each year. One year I made them all hand-embroidered jewelry like this and this. One year I made them all personalized felt slippers (a nod to our "shoe club"). And last year I made them all purses/bags.
Here are just a few of the tutorials I've used for their gifts:
I made this tote for my sister using navy and white striped fabric on the outside with yellow lining for a nautical feel. I modified the pattern and made a modern diaper bag for a friend using black and white chevron fabric.
I found adorable cards that say "Happy Handmade Christmas" on a blog called Lolly Chops. In fact, she has tons of amazing free printables here.
Are you ready to hear about my most successful homemade Christmas gift ever?
Are you really ready?
Ok, here we go...
I first discovered this idea of making pies in jars a couple years ago. I had to hunt and hunt for the jars (half-pint wide-mouth). I made homemade pie crust using my grandmother's recipe. I made one batch of pies using this chicken pot pie recipe and one batch of pies using this caramel apple pie recipe. I also made homemade sweet dinner rolls, and I froze all the pies and rolls.
Here are the actual pies I made last year:
I printed cute labels for the tops of the jars that had heating directions (the jars go right from freezer to oven!). We gave these treats to my dad and stepmom, Jared's dad, and Jared's grandma. Each recipient had several meals, each consisting of a pot pie and rolls for dinner and an apple pie for dessert. I was able to make these a month before Christmas, and I believe all were consumed in the first couple months after Christmas.
Jared's dad and grandma both requested this to be their repeated Christmas gift. They wash their jars and return them to me whenever they eat a pie. The jars are always handed to me with a smile and a passive comment about me needing to refill the jar with another pie.
The pies in jars are especially good for single people as they can have a full home-cooked dinner without tons of leftovers. But these are also great for busy families who would appreciate being able to throw several pies into the oven and have a hot meal.
If you're interested in making pies in jars, please learn from my endless hours of searching for the right jars. You can occasionally find them on Amazon, but you'll pay as much in shipping as you'll pay for the jars. The best deal is to purchase them from Ace Hardware online and choose free shipping to your local store.
If you've never made any homemade gifts, I highly encourage you to try. I bet you can find something that you can make, no matter what your skills are. Everyone has some talent to share, and you might as well tap into what your strongsuits are. And if you start now, you'll thank yourself in December!
Jessica
Friday, August 3, 2012
Dirty Laundry
I'm about to air my dirty laundry on the internet.
Literally.
When I'm doing some normal everyday task, I often wonder, "How does everyone else do this?" Sorting dirty laundry is one of those tasks. It took us a long time to come up with a system that works for us.
This might be a weird thing to share on the internet, but it would have been helpful to me to see how other people sort their laundry to give me ideas for our little system.
Keep in mind:
Once the dirty laundry is down in the basement, we sort it by color. We bought hampers at Target a couple years ago, and we started figuring out which colors to put in each bin.
Here's what our dirty laundry area looks like:
The color bins are as follows: bleach white, non-bleach white, blue (x2), green and gray, red and pink (x2), and yellow/orange/brown. Purple clothes go into either blues or reds/pinks, depending on the shade or which bin has more room. There's also an unlabeled bin that is used as overflow if one color gets out of control.
To be completely honest, this is actually what our bins looked like just before I gave them a mini-makeover:
The old labels were printed on cardstock, and I used clear packing tape to attach the labels to the hampers and also protect the labels somewhat. Over time, some of the labels curled and one smeared from wet clothes being up against the ink on the label.
I peeled off the old labels and took all the hampers outside. Dust and lint had collected in the bottoms, so I used my hose and a scrubbing brush to clean them out. Once they were dry, they were ready for their new labels.
I used Microsoft Word to create the labels. If you know me at all, then you know I loved choosing the fonts and colors.
I printed four labels per sheet (on cardstock) and cut them apart. Then I fired up my handy dandy laminator.
Sidenote: the warnings on the top of the laminator crack me up:
I cut around each laminated label and used clear packing tape to attach the new labels to the newly cleaned hampers.
When one of the hampers is full, we simply lift it out of the little hamper grid, take it over to the washer (to the left of this photo), and load the laundry into the washer.
This system works well for us. We've tried various layouts for the hampers and different ways of separating our laundry, but this seems to be the best fit so far.
I know it probably seems absurd to many people that I wrote a whole post about how I sort my dirty laundry. I'm just curious how other people do mundane tasks such as this. I'd love to hear if any of you have different methods/systems for sorting laundry.
Is there a task that makes you wonder "How does everyone else do this?"?
Jessica
P.S. If you would like me to email you my Word document of labels (completely customizable), simply leave me a comment with your email address.
Literally.
When I'm doing some normal everyday task, I often wonder, "How does everyone else do this?" Sorting dirty laundry is one of those tasks. It took us a long time to come up with a system that works for us.
This might be a weird thing to share on the internet, but it would have been helpful to me to see how other people sort their laundry to give me ideas for our little system.
Keep in mind:
- We have five people in our family. Kids clothes are smaller, but it seems like they each go through several outfits per day. Each kid also adds to the number of bath towels, hand towels, sheets, blankets, etc. that need to be washed.
- Our washer, dryer, and dirty laundry bins are all downstairs in our creepy, gross, unfinished basement. Try not to be frightened by the photos.
Once the dirty laundry is down in the basement, we sort it by color. We bought hampers at Target a couple years ago, and we started figuring out which colors to put in each bin.
Here's what our dirty laundry area looks like:
The color bins are as follows: bleach white, non-bleach white, blue (x2), green and gray, red and pink (x2), and yellow/orange/brown. Purple clothes go into either blues or reds/pinks, depending on the shade or which bin has more room. There's also an unlabeled bin that is used as overflow if one color gets out of control.
To be completely honest, this is actually what our bins looked like just before I gave them a mini-makeover:
The old labels were printed on cardstock, and I used clear packing tape to attach the labels to the hampers and also protect the labels somewhat. Over time, some of the labels curled and one smeared from wet clothes being up against the ink on the label.
I peeled off the old labels and took all the hampers outside. Dust and lint had collected in the bottoms, so I used my hose and a scrubbing brush to clean them out. Once they were dry, they were ready for their new labels.
I used Microsoft Word to create the labels. If you know me at all, then you know I loved choosing the fonts and colors.
I printed four labels per sheet (on cardstock) and cut them apart. Then I fired up my handy dandy laminator.
Sidenote: the warnings on the top of the laminator crack me up:
I cut around each laminated label and used clear packing tape to attach the new labels to the newly cleaned hampers.
When one of the hampers is full, we simply lift it out of the little hamper grid, take it over to the washer (to the left of this photo), and load the laundry into the washer.
This system works well for us. We've tried various layouts for the hampers and different ways of separating our laundry, but this seems to be the best fit so far.
I know it probably seems absurd to many people that I wrote a whole post about how I sort my dirty laundry. I'm just curious how other people do mundane tasks such as this. I'd love to hear if any of you have different methods/systems for sorting laundry.
Is there a task that makes you wonder "How does everyone else do this?"?
Jessica
P.S. If you would like me to email you my Word document of labels (completely customizable), simply leave me a comment with your email address.
Wednesday, August 1, 2012
Ivory Soap Explosion
Item #28 on our Summer List is "Do a Science Experiment." I had more than one simple experiment in mind when I wrote that on our list, but some days I just do one cool thing and consider that I've done my part to be fun for the day.
We actually did this little experiment on the same day that we made all the Science Discovery Bottles. Later in the day, after Gracen came back to our house, we followed the simple instructions here at Mom to 2 Posh Little Divas.
I had purchased Ivory bar soap at Walmart. I unwrapped one bar and cut it into four pieces.
I put ONE piece of soap on a paper towel in the microwave. Our microwave was seriously gross prior to this experiment, so I figured getting soap in the microwave couldn't hurt anything.
I pulled chairs over in front of the microwave so the little kids could stand on them. The kids watched as I started the microwave.
The directions said to microwave for 1-2 minutes, but ours definitely needed less than 1 minute. I'd recommend about 45 seconds.
I opened the door and we marveled at our big white soap cloud. By the time I took this photo, it had somewhat deflated:
I wanted the bigger kids to also get a front row view, so we microwaved another piece of Ivory with just Gracen and Layla watching.
I got a better photo of the second Ivory explosion:
I dumped each microwaved piece of soap into a foil pan so the kids could play with it. It was super light and felt like tissue paper.
We microwaved a third piece for anyone who wanted to watch.
The funniest part of this whole experience was that the kids could not stand the smell of the Ivory soap!
They were seriously grossed out by it. That's why we never got to the fourth piece of soap. We threw away the exploded soap in our big outside garbage can.
Griffin even said, "Mom, can I go back to my room for naps now so I don't have to smell that smell?"
I was just cracking up the whole time because the kids were genuinely grossed out by soap.
The soap that did get on the microwave walls just wiped off (it was like pieces of tissue stuck to the walls). I needed to clean my microwave and get rid of the soap smell, so I used the trick of microwaving water with lemon juice (I use a glass measuring cup) and letting it sit in the microwave for a bit. It loosened all the bits of food and freshened the smell inside the microwave.
This was a cheap, easy, quick activity. We will clearly not be doing it again (or ever be using Ivory soap!) due to everyone hating the smell. It was entertaining though and something fun to do with our afternoon.
Jessica
We actually did this little experiment on the same day that we made all the Science Discovery Bottles. Later in the day, after Gracen came back to our house, we followed the simple instructions here at Mom to 2 Posh Little Divas.
I had purchased Ivory bar soap at Walmart. I unwrapped one bar and cut it into four pieces.
I put ONE piece of soap on a paper towel in the microwave. Our microwave was seriously gross prior to this experiment, so I figured getting soap in the microwave couldn't hurt anything.
I pulled chairs over in front of the microwave so the little kids could stand on them. The kids watched as I started the microwave.
The directions said to microwave for 1-2 minutes, but ours definitely needed less than 1 minute. I'd recommend about 45 seconds.
I opened the door and we marveled at our big white soap cloud. By the time I took this photo, it had somewhat deflated:
I wanted the bigger kids to also get a front row view, so we microwaved another piece of Ivory with just Gracen and Layla watching.
I got a better photo of the second Ivory explosion:
I dumped each microwaved piece of soap into a foil pan so the kids could play with it. It was super light and felt like tissue paper.
We microwaved a third piece for anyone who wanted to watch.
The funniest part of this whole experience was that the kids could not stand the smell of the Ivory soap!
They were seriously grossed out by it. That's why we never got to the fourth piece of soap. We threw away the exploded soap in our big outside garbage can.
Griffin even said, "Mom, can I go back to my room for naps now so I don't have to smell that smell?"
I was just cracking up the whole time because the kids were genuinely grossed out by soap.
The soap that did get on the microwave walls just wiped off (it was like pieces of tissue stuck to the walls). I needed to clean my microwave and get rid of the soap smell, so I used the trick of microwaving water with lemon juice (I use a glass measuring cup) and letting it sit in the microwave for a bit. It loosened all the bits of food and freshened the smell inside the microwave.
This was a cheap, easy, quick activity. We will clearly not be doing it again (or ever be using Ivory soap!) due to everyone hating the smell. It was entertaining though and something fun to do with our afternoon.
Jessica
Subscribe to:
Posts (Atom)