Showing posts with label crafts. Show all posts

Monday, September 4, 2017

Shirts for a Broken Arm

Our little friend Garrit recently flipped off his bike, causing him to dislocate his elbow and break a bone in his arm.  He is in a soft cast with pins in his elbow at the moment, and his mom told us that getting him dressed in an extremely difficult task.

Yesterday while I was sitting in church, and idea hit my brain out of nowhere (Divine inspiration!).  I thought I'd share it with you just in case someone else out there has the misfortune of trying to dress someone in a cast.

We dug through the boys' closets and came up with two shirts we could give Garrit.  He doesn't like to wear button-up shirts, so we knew we needed to use t-shirts.

I started by cutting the shirt at the side seam.  Garrit broke his left arm so I cut the left side of the shirt.  I cut all the way up the side and the underside of the sleeve.

I drew the orange line to show where I cut the shirt.

I folded in a little fabric from the cut and pressed it.  I didn't measure, but I'd guess it was somewhere between 1/4-1/2 inch.


*IMPORTANT:  On the front side of the shirt, press the 1/4 inch or so toward the wrong side of the fabric (inside of the shirt).  On the back side of the shirt, press the fabric toward the right side (outside/back side of the shirt).  You'll see why later.

I was planning to use pieces of Velcro, so I wanted the edges to be nice.  Therefore, I sewed a zig-zag stitch over the edge of the fabric I had just pressed.  I later changed my Velcro plan and realized this zig-zag step wasn't really necessary.


I happened to have some black sew-on Velcro on hand.  I had picked it up on clearance at Hobby Lobby who-knows-how-long ago.  Because I have a problem.  But my little problem with buying clearance items at Hobby Lobby benefits Garrit in this case.  My Velcro is one long strip but you can also buy it in squares or circles.  I am lazy so I decided to sew one long strip onto the shirt so I didn't have to start and stop a bunch with little spots of Velcro. 

I placed the rougher side of the Velcro on top of the zig-zag stitching on the back of the shirt, lining up the Velcro strip with the edge of the shirt.  I sewed a straight stitch all the way around the Velcro strip.  I decided to do one long strip of Velcro down the side of the shirt and one short strip along the sleeve edge.


I did the same process to sew on the softer strip of Velcro on the front side of the shirt.  Remember that the Velcro on the front side of the shirt needs to be on the back of the shirt fabric, and the Velcro on the back of the shirt needs to be on the right side of the shirt.  (Wow, that was confusing!)


On the back side of the Velcro, you can see the original zig-zag stitching as well as the stitching around the Velcro.

Now the shirt can be closed by pressing the Velcro strips together.  The front of the shirt overlaps the back of the shirt.  

Also I chose to put the scratchy and soft parts of the Velcro where I did so that if they come askew, the softer part of the Velcro will be facing Garrit's skin.


Now Garrit can put the shirt on over his head and put his good arm in the sleeve.  Then his mom can carefully wrap the shirt around his torso and hurt arm and Velcro it.  He doesn't have to go through the agony of trying to lift his arm and wrestle it through the sleeve.

Plus Garrit LOVES Star Wars so he's just pumped to have a new Star Wars shirt.

I wanted to try one other method for a cast-friendly shirt.  We had a Marvel shirt my boys had outgrown, and it is that soft, worn-in kind of tshirt.  

I cut the side and under the sleeve just as with the other shirt.  I folded over 1/4 inch or so from the cut edge and pressed.  I did not waste time with the zig-zag step.

I bought some snap tape from Hobby Lobby.  It comes in black or white.  Since the shirt is orange and neither really matches, I just chose the white.

I put the zipper foot on my sewing machine and got to work sewing the snap tape onto the shirt.  It's a similar process to sewing on the Velcro except the snaps like to fight with the presser foot for space.  The snap tape is flexible enough to sew one continuous strip up the side of the shirt and the underside edge of the sleeve.

Another tip:  try not to stretch the tshirt as you sew.

Here's the second shirt:


I put the strip with the pokey halves of the snaps on the back of the shirt so the pokey parts are facing away from Garrit.  Just in case.

He's going to try out both shirts and tell me if he prefers the Velcro or the snaps.

Life in a cast is hard, and I'm just hoping these modified shirts help Garrit with one task in his day!

Jessica

Tuesday, July 26, 2016

The Lazy Way to Fix a Big Waistband

At the end of the season last summer, I bought some clearance swim suits/trunks for my kids.  There was one pair of swim trunks that Nolan wouldn't wear this year because the waistband was too big and they didn't have a drawstring or any way to adjust them.

I kept putting off fixing them because fixing them the "right" way seemed time-consuming.  So today I fixed them the lazy way!

I bought shoestrings that matched the swim trunks.  The only other supply I needed was some FrayCheck, which I always have in my sewing arsenal.


I needed to cut two openings in the waistband, one on each side of the front center.

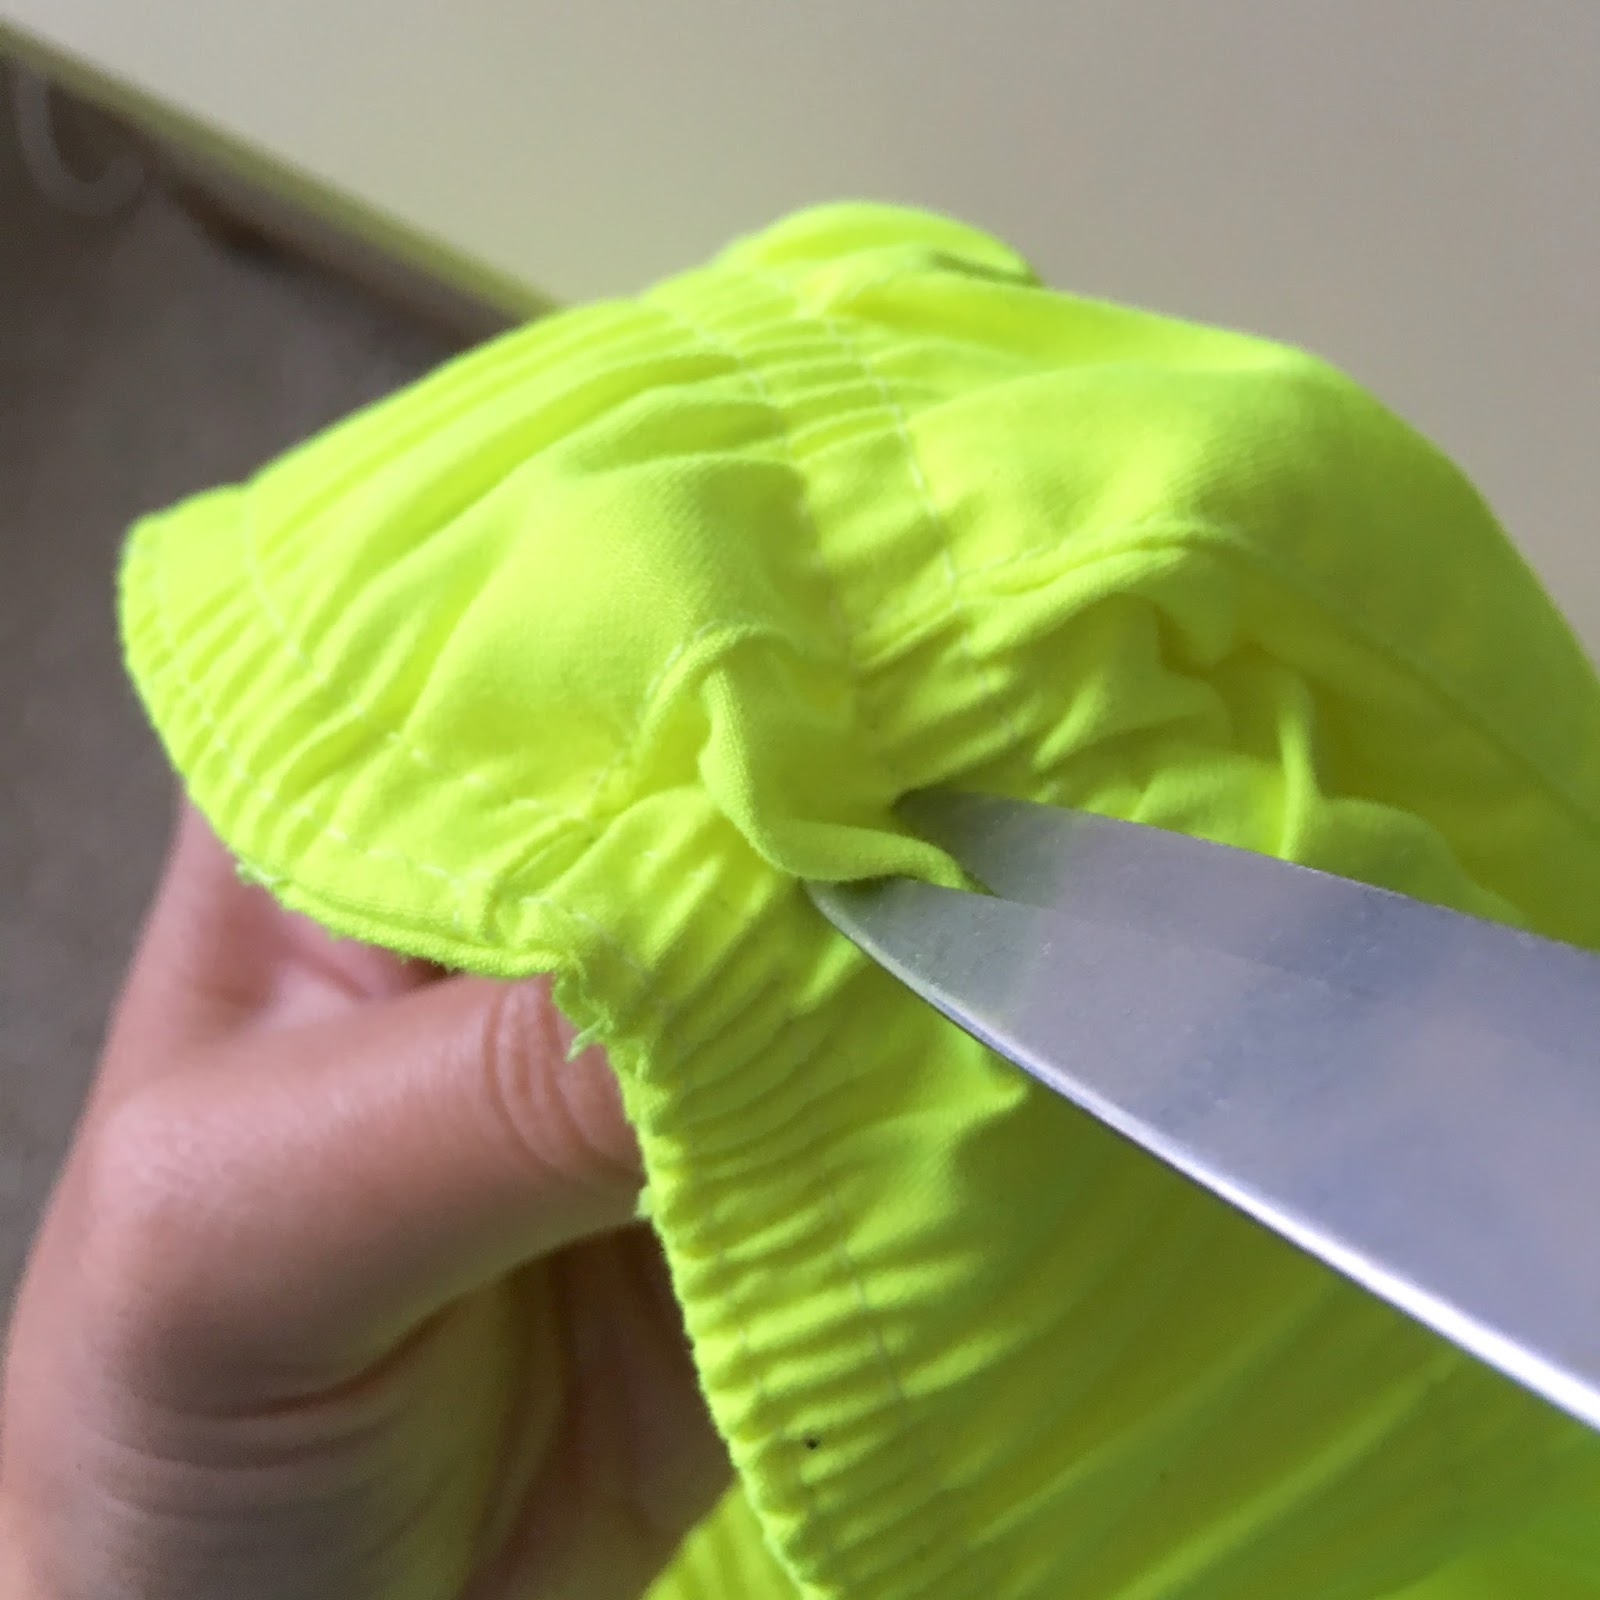
I gathered up just the front layer of fabric and made a vertical cut.


I did the same on the other side of the front center.

It's hard to see but there's a cut near each of my fingers.
I coated the new openings with FrayCheck to keep them from, well, fraying.


Then I fed one end of the shoestring through one opening and pushed it through the waistband until it came out the other opening.


And they're done!


Now Nolan can tighten them and avoid any embarrassing swim situations.

P.S.  Neon yellow is hard to photograph!

Jessica

Tuesday, April 5, 2016

A Modern Wreath

Yesterday I just wanted to do something, anything, to feel normal.  So I decided to tackle a craft.  And finish the heck out of that thing so I could feel like I accomplished something.

Inspired by this wreath that I recently spotted on Instagram, I made a new modern wreath for our front door.


I had some navy and white striped fabric left over from a previous project.  I went to Hobby Lobby and bought two embroidery hoops, some heavy duty Heat & Bond, and some fake succulents.  I had the white ribbon on hand already.

I love succulents.  They're like a plant-flower hybrid.  I really want some live ones in my house.  But at least now I found an excuse to get some fake ones!


I decided to use an 18" embroidery hoop and a 12" hoop.  I just liked these proportions.

I started by laying the bigger hoop on my fabric and cutting a square of fabric that was a little bigger than the hoop.


Then I cut a matching size (ish) square of the Heat & Bond.


I followed the package instructions and ironed the Heat & Bond to the back of my fabric.  This isn't strictly necessary but it gives the fabric more thickness and stiffness.


The next step was to cut out a donut-shaped piece of my fabric.  Mmm donuts.

I chose to separate the two rings of my bigger embroidery hoop and trace around the inner ring.  You could also trace around the outer ring and just cut a little inside your line so your fabric doesn't hang outside the hoop.

I used a black pen on the white stripes and a white pencil on the navy stripes.  Because I'm fancy like that.

Next I traced my inner circle.  I laid the smaller hoop on the fabric and measured all around it to make sure it was centered.  C'mon people, you knew I would be obsessive.  I traced inside the small hoop and knew I'd have to cut just outside the line to avoid having fabric show in the middle of the wreath.


I cut out the fabric donut. 

My glue gun had been heating up while I was thinking about donuts cutting out the fabric.  I very carefully hot glued the embroidery hoops in their proper places.


You may have noticed that I chose to place the screw-clasp-closure-thingy on the very top of the big embroidery hoop and in the bottom right region of the smaller embroidery hoop.  I knew my succulents would cover said thingy on the smaller hoop.

I had picked up some random fake succulents from Hobby Lobby.  I used wire cutters to cut off the stems.  I played around with the arrangement and then hot glued them to my wreath.


I got a white ribbon from my endless hoard of ribbons and fed it between the two rings of the big embroidery hoop.  Luckily I hadn't glued them together.  I tied a pretty bow.  Then I realized that it would be slightly twisted if I hung it on my wreath hanger as-is.  So I grabbed a white pipe cleaner, fed it through the knot of the bow, twisted the ends, and made a ring.


That made it hand straight forward on my wreath hanger.  When I put it up on our front door, I had to retie the bow because the wreath hung too low.

Don't we wish that my front door was painted a fun color?

Yes, it's crooked in this picture.  Yes, I fixed it.  No, I didn't take a new picture.

So I accomplished something.  I did something creative for the first time in quite awhile.  It did come at a price.  When Nolan and I went to Hobby Lobby for these supplies, he was suffering with a colossal headache.  We had to stop three different times for him to lay down on the floor in Hobby Lobby.  While other shoppers and employees looked at us like we were loony.  But lying flat eased the pain and then we could make it through a few more aisles.  I felt terribly selfish for dragging him to Hobby Lobby.  But we are trying to get to a new normal where we don't just shut ourselves at home and lay around trying not to anger his pain.  So I made a wreath.  Apparently that is part of my new normal.

Jessica
Monday, January 11, 2016

Today's Time: Badge Removal

I've said it before and I'll say it again:  sometimes it's really hard to explain where my time goes.

For example, let me tell you what I did with today's time.

I've been down for two days with the flu.  I'm talking down like I don't think I have the energy to get up and pee.  The problem is that I really don't just sit.  Or lay.  Ever.

So today I pulled out a project that could be done from a sitting/reclining position since that's all my flu-ridden body would allow me to do.  I've been working on this project on and off for a few months.

These are Caravan sashes and scarves:


What's Caravan, you ask?  It's a Christian-based scouting program that takes place at our church on Wednesday evenings during the school year.  Kids earn badges that are added to their sashes and scarves.

Those sashes and scarves and badges cost a lot of money for the church.  Another church donated two boxes of used sashes and scarves to our church.  So I was given the task of removing all the badges.

I'm stripping these babies for parts.

Roughly 30-40% of the donated items had current badges on them, and the rest have outdated badges that can no longer be used.  But we could really use the sashes and scarves once the outdated badges are removed.

Some of the badges were hand-sewn on.  More were machine-sewn on.  I can use my seam ripper to remove the stitching and ultimately the badges.  Then I have to pick all the little threads off the badges and sash/scarf.

Some of the badges were hot glued on.  These peel off fairly easily and leave behind a white-ish shadow where the glue was.  Other badges were applied with some sort of mystery adhesive.  Some of these leave behind a thin shiny layer.  Others require Hulk strength to pull off and leave behind a thick rubbery glue.


A few of the sashes had badges that had been safety pinned to them.  These just required time and diligence to not give myself tetanus.

It's slow going.  It makes all my fingertips bruised from pulling on every badge and thread.  It makes my fingernails rough and broken and split.


It also occasionally does this to my seam ripper:

If you are not a seamstress, you may not realize that this is missing two parts that snapped off.
I have to take a break until my fingers heal and I get a new seam ripper.  Then I'll tackle the remaining 19 scarves (yes I counted).

I now have a bag of badges that can be reused:


A bag of badges that can no longer be used:


And a stack of stripped sashes and scarves that need to somehow have the adhesive removed:


So...does anyone know how to remove mystery adhesive and hot glue residue from fabric?  If so, PLEASE leave me some advice in the comments!  I'll be asking the Google for help on this one, but I'd rather hear from actual people.  If I can't get these sashes and scarves clean in order to be passed on to kids in our church, then all my hard work (and sacrificed fingernails and seam rippers) will be for nothing!

Now my nighttime cold medicine is kicking in and my head is getting fuzzy.  Does that make anyone else think of Meg Ryan in You've Got Mail?  If so, we should be friends.  Or we probably already are.

Ok, time to lay back down.  And find something to do while I'm resting.

Jessica

Friday, September 18, 2015

Owl Cupcake Toppers

This weekend I will be hosting a baby shower at church (along with my trusty church shower teammates).  We will be celebrating the upcoming arrival of a baby girl, and our theme for the shower is owls with pink and purple.

I decided to make fondant toppers for my cupcakes.  These need to be made a couple days ahead of time so the fondant can dry out to hold its shape.

Here's what I came up with:

I looked around Pinterest and just copied what I liked best about each version of owl cupcake toppers I found.

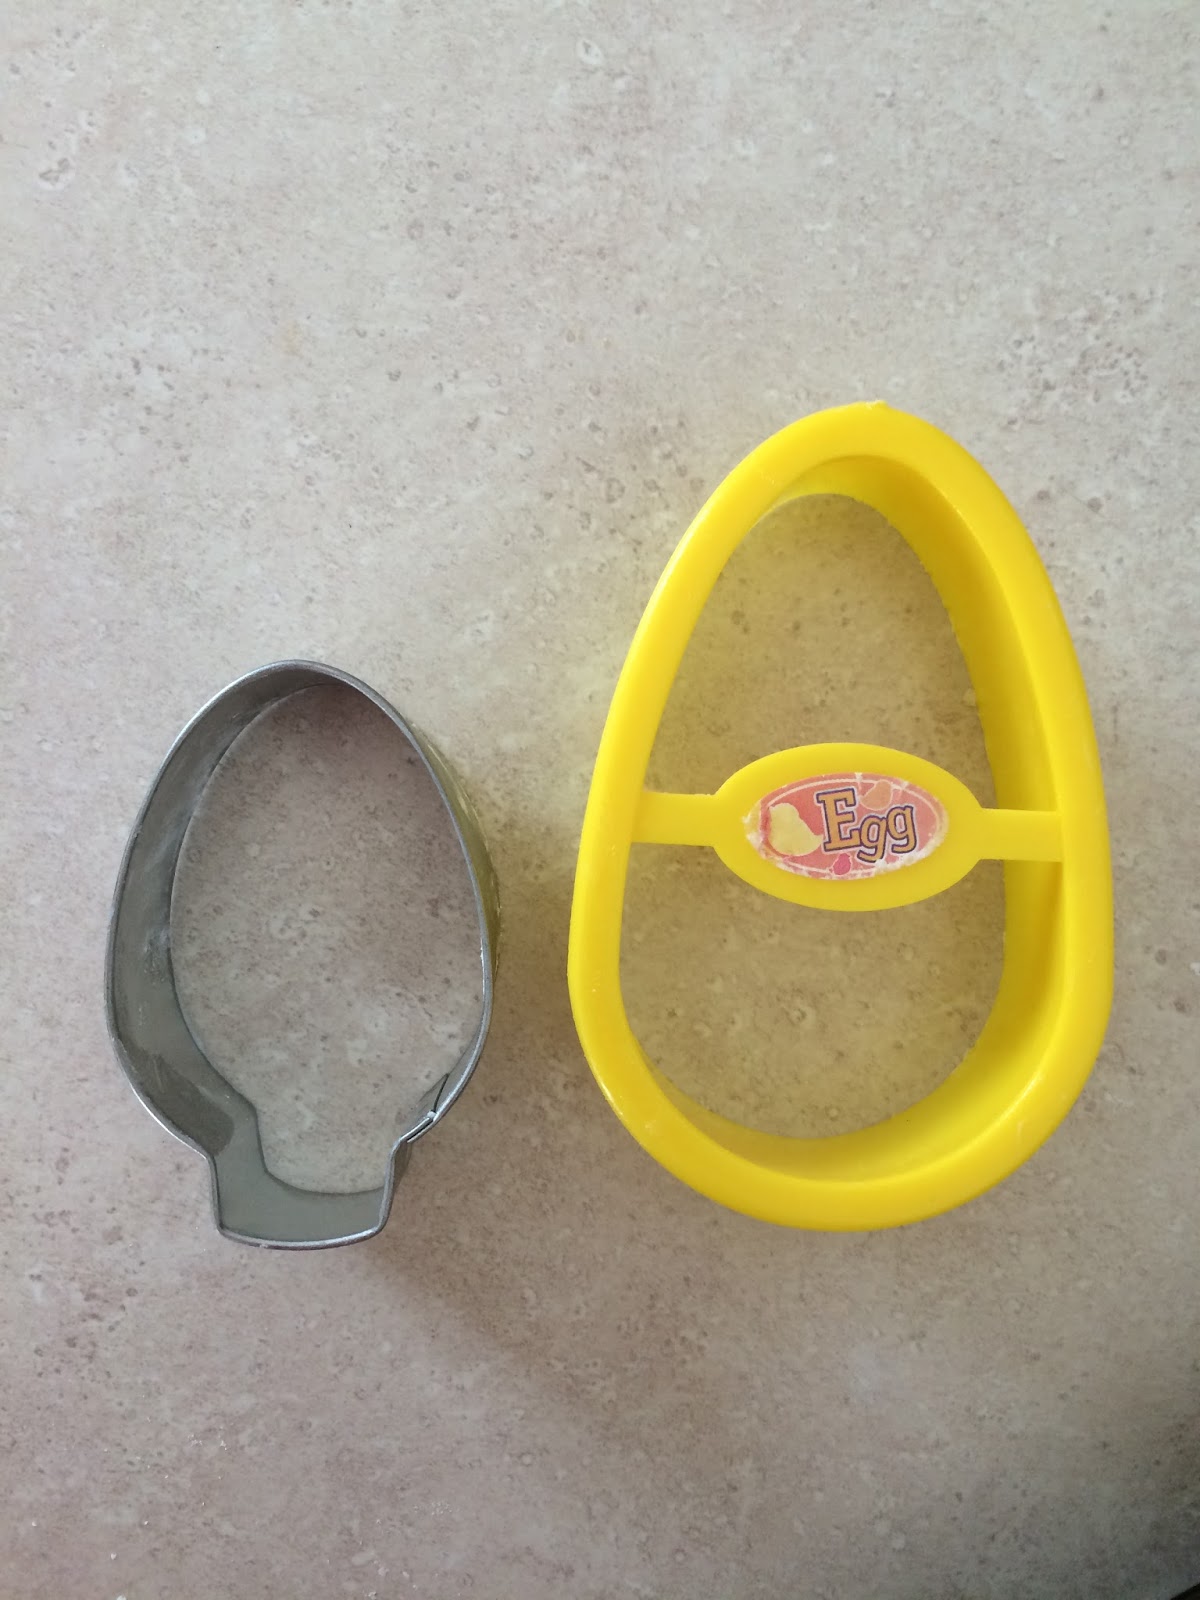
I used my Christmas light bulb cookie cutter to cut out the body of the owl.  I used my Easter egg cutter to cut off the bottom and top of the Christmas light bulb.


Then I used my leaf cutter to make the wings.  I put purple wings on the pink owls and pink wings on the purple owls.


I made the marks on the owl bellies by using this frosting tip:


I used a large round frosting tip to cut out white circles for the eyes.


I tinted some fondant orange to make the beaks and feet.


I had to cut teeny tiny diamonds for the beaks.  I wasn't in love with the triangle beaks I saw on most of my inspiration pictures.  There was no shortcut here.  I just had to cut strips of orange fondant and then cut it into diamonds with a knife.

For the feet, I cut out little flowers and then cut those in half.


I had some leftover fondant, so I cut out large white circles for the owls to rest on.  The feet weren't adhering well to the owl bodies, so this way I could just stick them to the circle backdrops.


The last step was using a black food coloring marker to draw in the pupils of the eyes.  Since this is a baby girl shower, I made the eyes girly.


All done!  I'll bake the cupcakes tomorrow, but I'll wait until right before the baby shower to frost the cupcakes and put the owls on top of the frosting.  If you put the toppers on too early, the fondant absorbs the moisture from the frosting and it wilts and melts.  Not cute.

*Just in case you're interested, I make homemade marshmallow fondant following the recipe/tutorial here.  I promise you this fondant is so much more delicious than store-bought fondant!  I put wax paper on cookie sheets and use those to lay out my fondant shapes while I assemble them and they dry.  That's the ugly background in these pictures. 

Basically, I get to have adult Play-doh time when I make fancy toppers for baby shower cupcakes. :)

Jessica