You may have thought I'm done posting about Nolan's 8th birthday. Well I'm not. This will conclude the birthday-that-never-ends.
We decided this would be a good time to have our first ever birthday party where we invite our kids' friends. We've always just done family parties because that's all we can fit in our house and that's just what has always worked best for us.
Our decision to let Nolan have his first friend party was largely based on guilt over Jared missing his birthday. It was also based on that fact that he's turning 8 and hasn't had a kid party, and he has been invited to lots of kid parties now.
So we did a full meal with simple dessert for Nolan's family party, and we just had a casual backyard cookout. For his friend party, we skipped the meal and focused on games and cake.
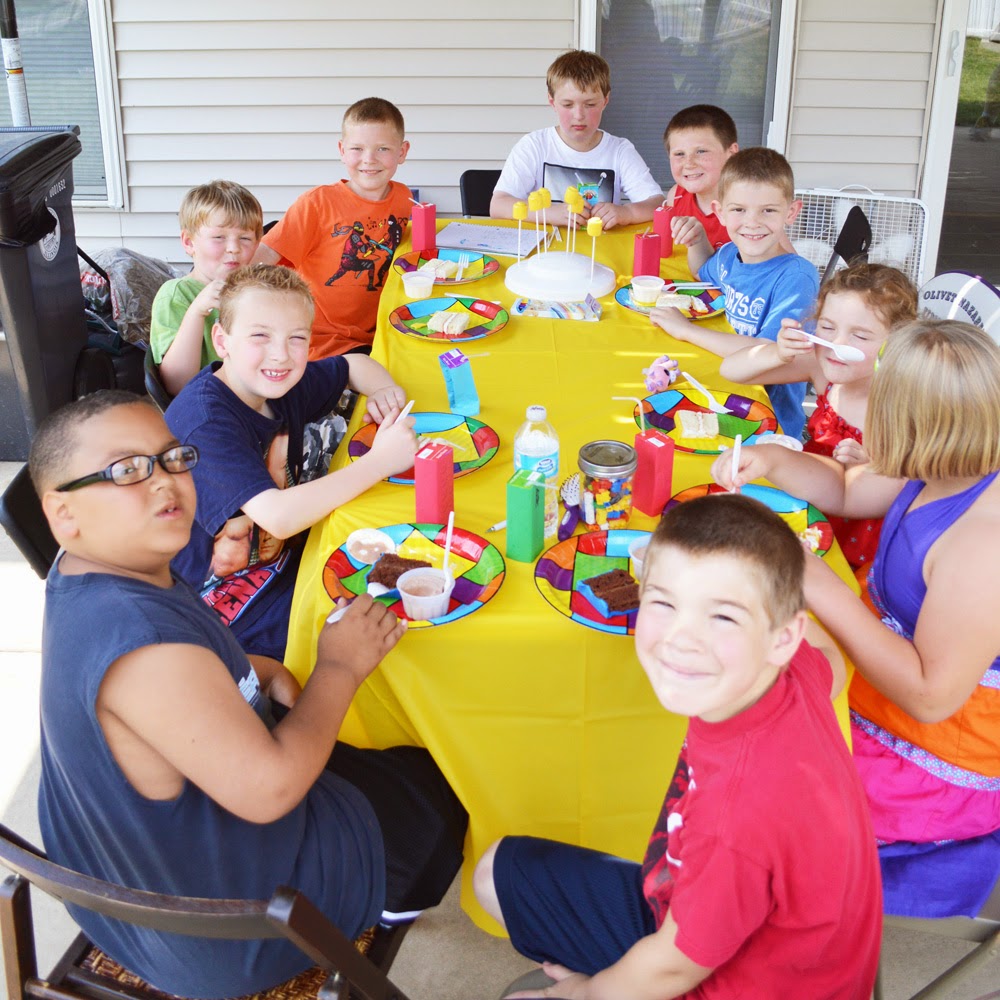
The toughest part was deciding who to invite and how to host all the children. We couldn't spend the money to rent out some big kid place, so we decided it would be fine to have a smaller party in our back yard. Then came the difficult task of deciding who to invite. Nolan has school friends and church friends, as well as friends of the family. Ultimately, we decided to invite just the boys from Nolan's class at school. That was 11 boys (plus one boy's sister whom Nora adores). We only had one boy RSVP that he couldn't come, so we were expecting quite a crowd. We ended up with several no-shows, so the crowd was manageable and fun. I still get a little sick to my stomach when I think that people's feelings may have been hurt because we only invited school friends, but we honestly tried to do what we thought would work the best. I'm sure we'll handle things differently as we go and learn.
Nolan wanted to do a Lego theme for the party. Now, there are a billion Lego party ideas online, and I didn't feel the need to come up with anything new. So I will tell you up front that I took advantage of the ideas available and just copied anything we wanted to do. I'll do my best to give proper credit as we go.
Without further ado...I give you: Nolan's Lego Party!
The Invitation
I used a free image from
Delia Creates and tweaked it in Photoshop to add my text and resize it. I printed the invitations on cardstock, cut them apart, and mailed them out.
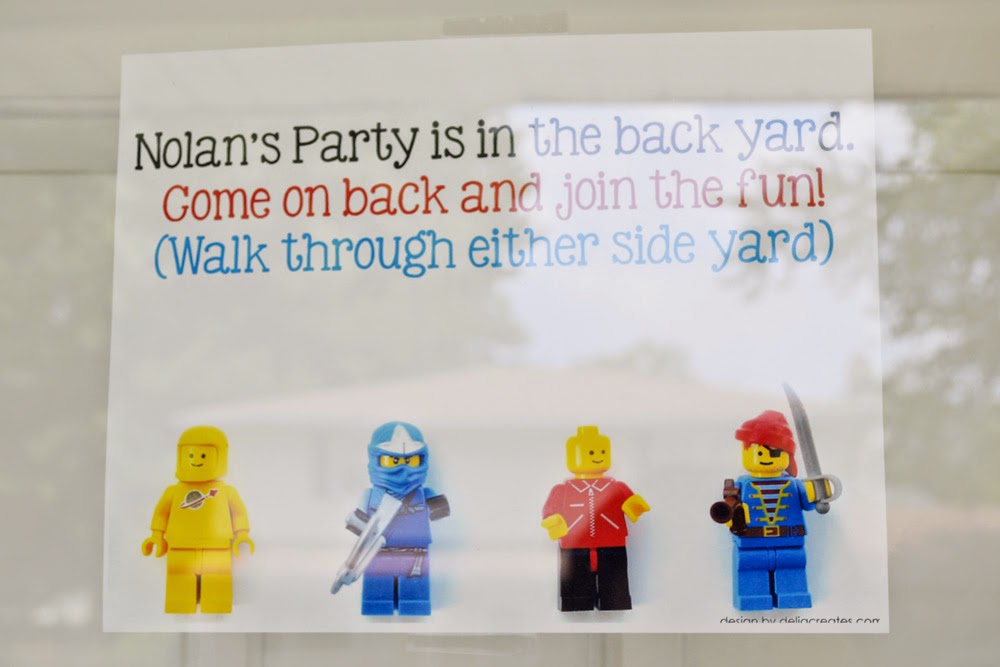
Delia Creates had another free printable image that could be used for invitations, and I used it to create a sign that I put up on our front door:
I used Photoshop to crop the image (I had to cut off one Lego guy) and add the text.
The Games
We started out with several games. I divided the kids into two groups and had them rotate around to various game stations.
One station was
Pin the Head on the Lego Guy. I printed out the Lego body and six heads from
Delia Creates. I used Staples Copy & Print online to print them as "small poster" and then picked them up locally the same day. I chose a glossy finish. I also used a coupon good for 50% off any copy & print order, so I got all 3 posters (the two for this game and one for another game) for about $10.
I cut out the Lego heads by just cutting a circle around the heads. I used poster putty on the backs of the heads so they could easily be pulled off and reused. I just picked up a bandana at Hobby Lobby for $0.99 for the blindfold.
The next game was to
guess how many Lego pieces were in a jar. I had counted them all as I filled the jar, and I just set out a notebook for the kids to record their guesses.
Even the adults guessed: Jared (my husband), Jared's mom ("Ammaw," who graciously offered to help me), and Linda (the mom of the brother and sister who came; she also stayed to help).
Wanna know the answer?? The actual number of Lego pieces in that jar was...133. The winning guess was Sarah with 101.
Another game/activity station was to
decorate your own Lego head marshmallow pop. I made them by sticking a long lollipop stick into a regular (large) marshmallow. Then I sliced some leftover marshmallows into quarters so each marshmallow made four round discs. I used a very small round cookie cutter to make those discs smaller. I attached a small disc to the top of each marshmallow pop using a tiny bit of melted yellow Candy Melts. Then I dipped all of the marshmallow pops in the yellow Candy Melts and let them dry. There are lots of other methods online, but this is how I chose to make them.
The kids got to draw faces on their marshmallow pops using edible markers (they have food coloring for ink). I had already added a few faces to the extras to get them started.
The most popular game of the party was called
Don't Eat Pete. I got this idea and printable from
Delia Creates. Again, I printed this game as a small poster with a glossy finish from Staples.
I taped the poster to a wooden cutting board so it wouldn't blow away in the wind.
The poster has 16 different Lego guys on it. I put a Skittle on each one (the original game used marshmallows, but Nolan loves Skittles). The idea is: one kid runs out of ear shot, the other kids decide which of the Lego guys is "Pete" for that round, then the player runs back to the group and eats a candy off of each guy until he reaches Pete. At that moment, the entire group yells, "Don't eat Pete!" That player's turn is then up and someone else gets to go. The goal is to be able to eat as many candies as possible before reaching Pete. One boy at our party made it to the second to last candy before he discovered (thanks to the shouts of the kids) that he had reached Pete. The kids LOVED this game.
What eight-year-old boy wouldn't love the chance to eat lots of candy and shout at his friends?
We let the kids jump on our new trampoline whenever there was down time.
Since it was a hot day and the party was all outside, I made sure to have a cooler full of ice-cold bottles of water. We just used a Sharpie marker to write their initials on the bottle caps so we knew whose was whose.
The Cake
Nolan really really wanted a cake that looked like a Lego block. I had heard that they're harder to make than you might think. I looked at tons of pictures online, read how lots of other people made them, and formulated my own plan.
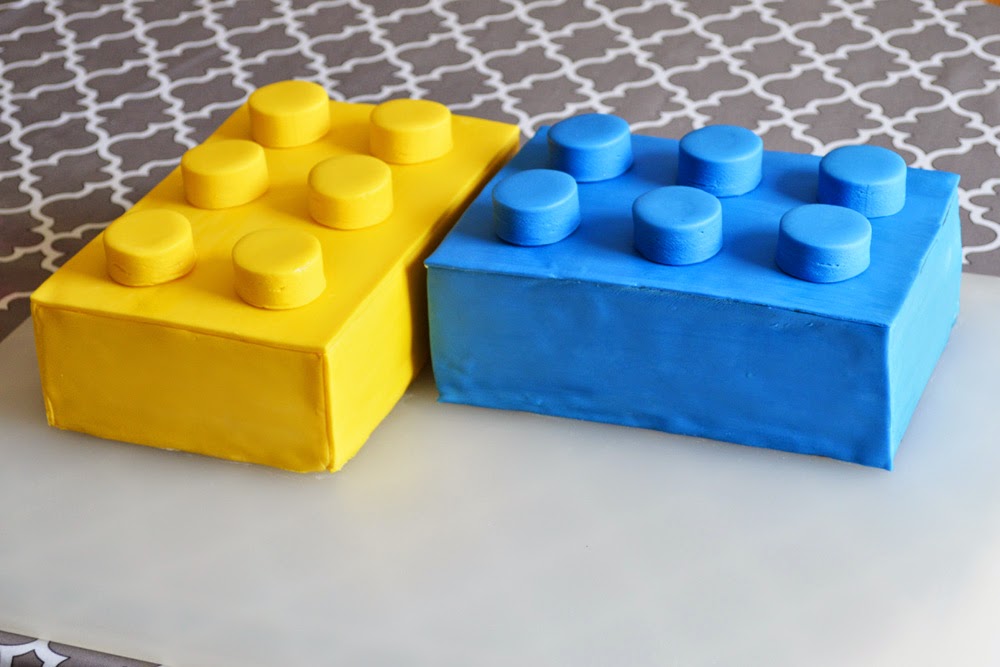
Let me start by showing you the finished product:
The yellow block is white cake with vanilla frosting. The blue block is chocolate cake with chocolate frosting.
For each cake, I baked a cake in a 9x13 pan. Mine is glass with rounded corners, so I trimmed the cooled cakes to have nice sharp corners. Then I cut each cake in half and stacked the two halves with frosting in between. Then I meticulously frosted the outsides of the cakes, working until I had smooth, flat, crisp sides. At that point I needed to let them chill in the fridge overnight, and the next day I pulled them out and let them get to room temperature before covering them with fondant.
I made homemade marshmallow fondant. My favorite tutorial and general website for marshmallow fondant is
What's Cooking America.
I tinted one batch of fondant yellow and one blue. I wanted the blue slightly darker, but I ran out of blue gel food coloring. Oh well.
I ultimately decided to cover the cakes one rectangle at a time. This gave me nice sharp corners so the finished cakes looked more like a real Lego. Plus every time I try to roll out my fondant to cover a whole cake at once, the fondant sticks to my counter no matter how much corn starch I use. This method was more time consuming but less stressful.
Once the cakes were covered, I rolled the leftover fondant so it was roughly an inch thick. Then I used a small round cutter to cut out circles for the "bumps." In hindsight, I would have made them slightly thinner/shorter. Nolan wanted 2x3 bumps because he said those are more rare pieces. I just used a little water to adhere the bumps to the covered cakes. I gave both cakes a quick wipe-down with a damp paper towel to remove any leftover cornstarch and to give them a shinier finish (like a real Lego). Voila!
Remember that you can't put fondant-covered cakes in the fridge! I assembled these cakes on my biggest white cutting board and let them sit out of the way until party time.
I waited until after the games were done and then I brought out the cake, ice cream, and juice boxes. I was afraid they wouldn't last in the heat if I got them out before we were ready!
Jared, my hero, found these candles at our local Kroger:
Can you believe that? They look like Legos, there are 8 of them, and they are the four main colors we used for the party!!
Nolan wanted to put his own candles on his cakes, and I didn't argue because honestly I wasn't sure where to put them!
To make things easy on myself, I bought ice cream that comes pre-portioned in little plastic cups. Plus the kids could choose a cup of vanilla ice cream or a cup of chocolate ice cream (to go with their vanilla or chocolate cake). My house is a battleground of chocolate vs. vanilla, so I wanted to accommodate our guests in the same manner I do my family members.
I picked up some juice boxes from Sam's, and I covered them to look like Lego blocks.
I started with the printable juice box covers found
here on Delia Creates. However, she created the printable covers for Hi-C juice boxes, which are apparently much shorter and slightly wider than my juice boxes. I ended up using my Silhouette software to resize the "bumps" and add more until they were just the right proportions for my juice boxes.
I printed two juice box covers per page onto colored paper and cut them apart with my paper slicer (love that thing). I removed all of the straws from the juice boxes (I saved them so the kids could drink the juice at the party!), and I used hot glue to adhere the covers to the juice boxes. Jared and I set up a little two-man sweat shop where he wrapped the papers and I hot glued them.
I had purchased plates and napkins on clearance at Hobby Lobby a couple weeks before the party. They're not perfectly "Lego," but Nolan and I thought they fit the overall feel of blocks.
Nolan decorated the cake table with a couple of his Lego creations and his new Lego guy display case.
The kids seemed to like their cake, ice cream, and juice.
One More Game
After dessert and presents, I had one last Lego game for the kids to play.
You may be familiar with a game called
Jump the River. At our friend Dakota's birthday party, we played Jump the River using two jump ropes to create a "river" over which the kids had to jump. Each round the ropes are spread a little further from each other, making a wider river for the kids to jump over. Any child who can't successfully jump over the river is out, and the game continues until just one child is left as the winner.
We played our version of Jump the River, using Lego blocks printed on cardstock to build the "river." We added another Lego block each round until we got a winner. And let me tell you, the boy who won our Lego version of Jump the River is bound to be a long jumper some day!
This game gave me a chance to get some great action shots.
It was pretty windy, so we had to weigh down the Lego block papers with rocks and flip flops.
In case you're curious, we didn't have any prizes for the winners of the games. I was nervous about this before the party but didn't want to spend money on prizes. The kids had so much fun playing the games, and no one even asked about prizes!
Party Favors
I made little favor boxes for each kid to take home. I used the free printable box templates from...you guessed it...Delia Creates. Click
here for her template. I cut them out, scored along the fold lines using my handy dandy bone folder (What do you mean
not everyone is as excited about their bone folder as I am???), folded them, and used hot glue to construct them.
I filled the boxes with
Candy Blox from Oriental Trading. They're kinda like SweetTarts, but you can actually build with them!
That's about all, folks. Now that I see all the party details in this blog post, I'm already thinking about things I will do differently next time. For example, the kids didn't care that I stayed up late to cover juice boxes with papers printed to look like Legos. They were thirsty; juice was cold and thirst-quenching. The end. I fell into the trap of making a party for Pinterest rather than real life.
Links
Here's a convenient list of links to printables and products I used for this party:
Delia Creates Lego Party (#1)
Delia Creates Lego Party #2
Delia Creates Juice Box Covers
Delia Creates Favor Boxes
Candy Blox
FoodWriter Primary Colors Edible Color Markers
Jessica