Showing posts with label sewing. Show all posts

Saturday, September 30, 2017

Halloween Costume Sleeve Fix

My friend Michele found the perfect Halloween costume for her daughter Abby.  Abby is a petite 7-year-old girl, and Michele ordered her costume in size 8-10.  They were so excited when it arrived.  Until Abby tried it on and discovered that the sleeves were too tight.  Really?!  Why is this the story with basically all Halloween costumes?  The sizing is terrible.

This is Abby's costume.  It's a Nom Nom.

One of my favorite things about being able to sew is that I can fix things.  So Abby's costume came to stay with me for a bit.

I had to give it some thought but here's what I came up with for the fix.

I carefully used my seam ripper to remove the stitching from the seam under the sleeve (running from the armpit to the sleeve band).

I cut strips from some scraps of interfacing, and ironed them onto the sleeve fabric on either side of the seam I just opened up.  This step may not have been necessary, but I could see that the costume fabric was very cheap and would rip easily.  So I just wanted to reinforce it.

I pressed each edge under (toward the inside of the sleeve).

I cut a piece of elastic from scraps I had on hand.  I didn't measure.  I just eyeballed it on one sleeve and cut the other piece of elastic to match.

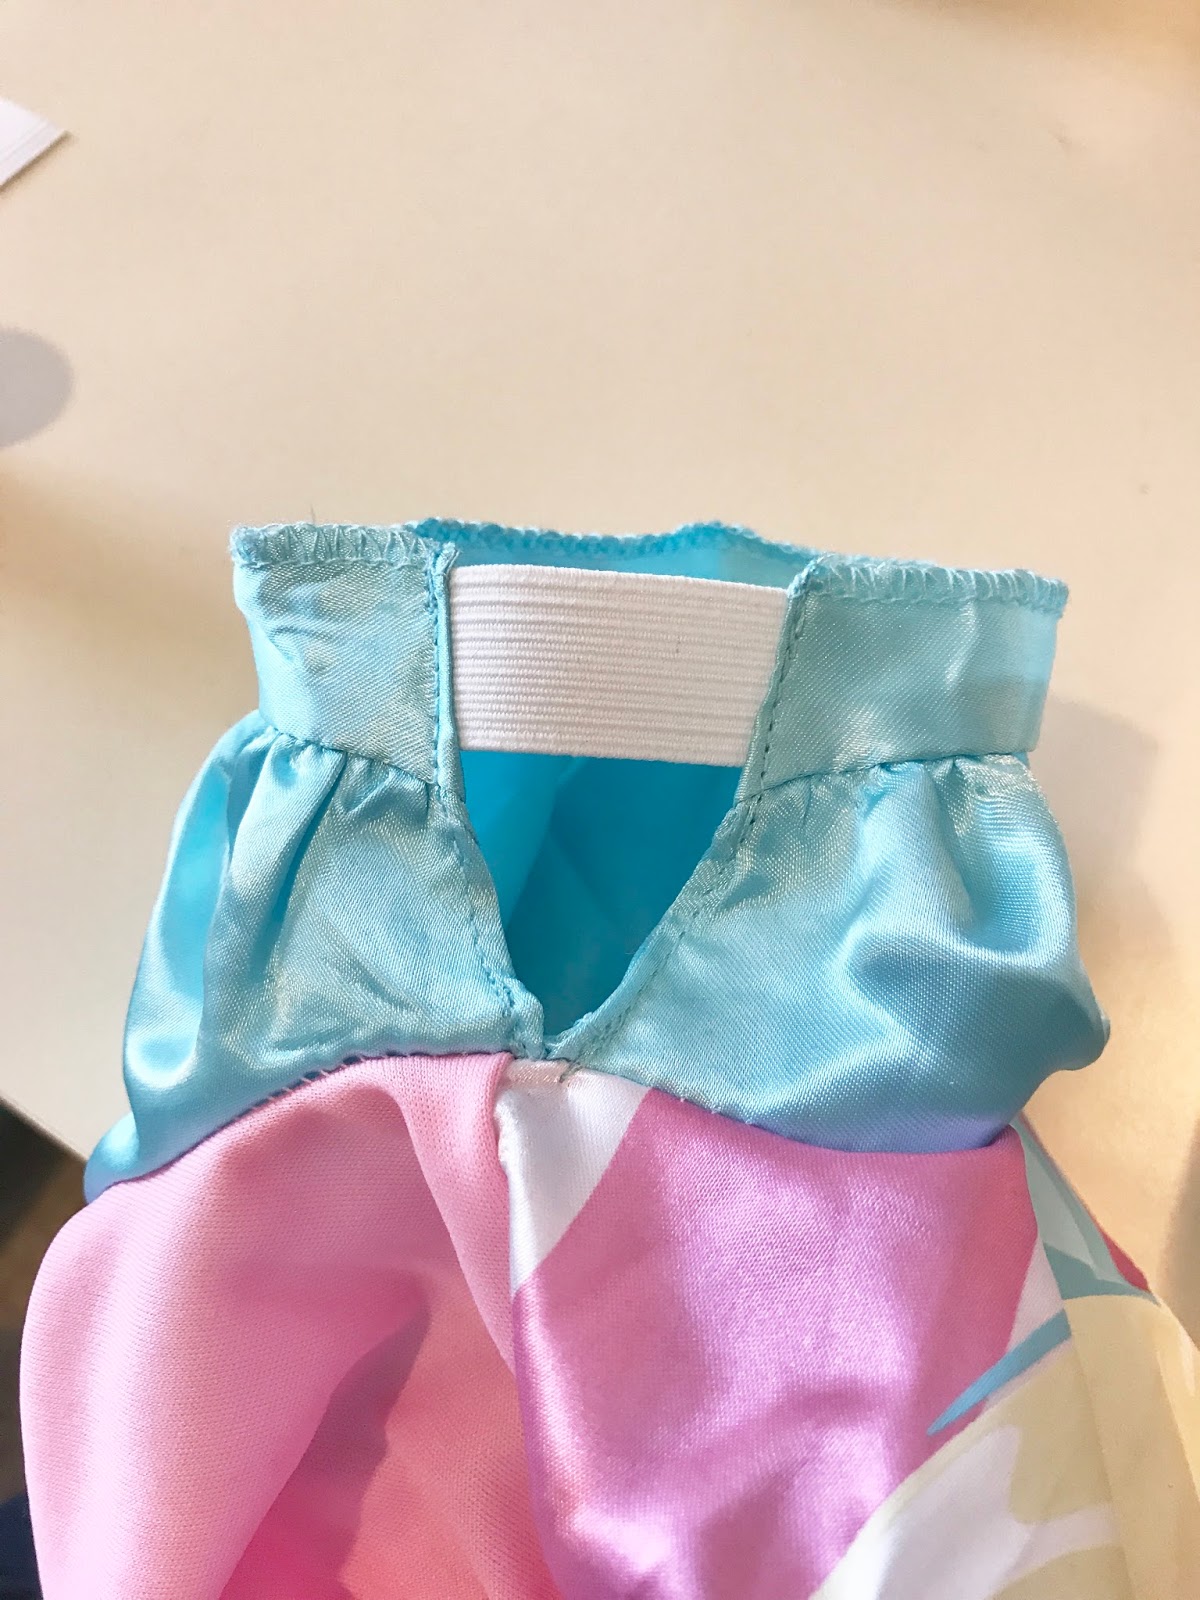
I sewed along each side of the sleeve opening, attaching the elastic as I sewed.  I tried to line up the elastic with the sleeve band.


I did the same thing with her other sleeve.  Her costume has one blue sleeve and one pink sleeve.


I was going to call it done, but then I remembered that I am the proud owner of a wheel of Sharpies.


I colored the elastic on each sleeve.  It's not amazing but will hopefully blend better with the costume.


Done!


Jessica

Wednesday, September 13, 2017

Belong

I recently pulled some treasures out of storage.

I inherited most of my grandmother's sewing supplies when she passed away because I myself spend a fair amount of time sewing.  But I put Grandma's sewing supplies into our storage unit when we moved, and I haven't really touched them since.

Part of me didn't really want to use Grandma's things because they were too special.  But I've healed enough from losing her to realize that using her sewing supplies is like spreading her love around.

So I went to the storage unit and grabbed a few things I can use.


Some of these antique buttons are exquisite.  They are beautiful.  Some have a neat story because of what they were originally used for (a wedding dress, a handmade coat, etc.). 


Some of the items are more useful than beautiful.  Zippers and snaps that can finish off projects and make things functional.

Each and every item is breathtaking to me.  Not because of how they look or what they can do.  They're priceless because of who they belonged to.

This afternoon I made my sister two pillow covers, and I used Grandma's zippers to close the covers.  I could have chosen the exact same zippers brand new from the store, but just knowing the zippers were Grandma's will make them instantly special to my sister, too.

They are special because of their owner.

The same is true for us.  You and I may look beautiful or work well, but the real reason why we are so valuable is because of who we belong to.

I belong to God.  You belong to God.  We are His. 

I've seen a lot of parents with their kids' names tatooed on their bodies.  Isaiah 49:16 says that God has engraved us on the palms of His hands.  If you believe in God, that Jesus is the Son of God, and that Jesus died for your sins to give you eternal life, then you belong to God.  Your name is engraved on the palm of His hand. 

"My sheep listen to my voice; I know them, and they follow me.  I gave them eternal life, and they shall never perish; no one will snatch them out of my hand."  John 10:27-28

There's a lot you can do well in this life.  But the true reason you are so valuable is not what you do or how you appear but to whom you belong.

You are treasured because you are His.

Jessica

Monday, September 4, 2017

Shirts for a Broken Arm

Our little friend Garrit recently flipped off his bike, causing him to dislocate his elbow and break a bone in his arm.  He is in a soft cast with pins in his elbow at the moment, and his mom told us that getting him dressed in an extremely difficult task.

Yesterday while I was sitting in church, and idea hit my brain out of nowhere (Divine inspiration!).  I thought I'd share it with you just in case someone else out there has the misfortune of trying to dress someone in a cast.

We dug through the boys' closets and came up with two shirts we could give Garrit.  He doesn't like to wear button-up shirts, so we knew we needed to use t-shirts.

I started by cutting the shirt at the side seam.  Garrit broke his left arm so I cut the left side of the shirt.  I cut all the way up the side and the underside of the sleeve.

I drew the orange line to show where I cut the shirt.

I folded in a little fabric from the cut and pressed it.  I didn't measure, but I'd guess it was somewhere between 1/4-1/2 inch.


*IMPORTANT:  On the front side of the shirt, press the 1/4 inch or so toward the wrong side of the fabric (inside of the shirt).  On the back side of the shirt, press the fabric toward the right side (outside/back side of the shirt).  You'll see why later.

I was planning to use pieces of Velcro, so I wanted the edges to be nice.  Therefore, I sewed a zig-zag stitch over the edge of the fabric I had just pressed.  I later changed my Velcro plan and realized this zig-zag step wasn't really necessary.


I happened to have some black sew-on Velcro on hand.  I had picked it up on clearance at Hobby Lobby who-knows-how-long ago.  Because I have a problem.  But my little problem with buying clearance items at Hobby Lobby benefits Garrit in this case.  My Velcro is one long strip but you can also buy it in squares or circles.  I am lazy so I decided to sew one long strip onto the shirt so I didn't have to start and stop a bunch with little spots of Velcro. 

I placed the rougher side of the Velcro on top of the zig-zag stitching on the back of the shirt, lining up the Velcro strip with the edge of the shirt.  I sewed a straight stitch all the way around the Velcro strip.  I decided to do one long strip of Velcro down the side of the shirt and one short strip along the sleeve edge.


I did the same process to sew on the softer strip of Velcro on the front side of the shirt.  Remember that the Velcro on the front side of the shirt needs to be on the back of the shirt fabric, and the Velcro on the back of the shirt needs to be on the right side of the shirt.  (Wow, that was confusing!)


On the back side of the Velcro, you can see the original zig-zag stitching as well as the stitching around the Velcro.

Now the shirt can be closed by pressing the Velcro strips together.  The front of the shirt overlaps the back of the shirt.  

Also I chose to put the scratchy and soft parts of the Velcro where I did so that if they come askew, the softer part of the Velcro will be facing Garrit's skin.


Now Garrit can put the shirt on over his head and put his good arm in the sleeve.  Then his mom can carefully wrap the shirt around his torso and hurt arm and Velcro it.  He doesn't have to go through the agony of trying to lift his arm and wrestle it through the sleeve.

Plus Garrit LOVES Star Wars so he's just pumped to have a new Star Wars shirt.

I wanted to try one other method for a cast-friendly shirt.  We had a Marvel shirt my boys had outgrown, and it is that soft, worn-in kind of tshirt.  

I cut the side and under the sleeve just as with the other shirt.  I folded over 1/4 inch or so from the cut edge and pressed.  I did not waste time with the zig-zag step.

I bought some snap tape from Hobby Lobby.  It comes in black or white.  Since the shirt is orange and neither really matches, I just chose the white.

I put the zipper foot on my sewing machine and got to work sewing the snap tape onto the shirt.  It's a similar process to sewing on the Velcro except the snaps like to fight with the presser foot for space.  The snap tape is flexible enough to sew one continuous strip up the side of the shirt and the underside edge of the sleeve.

Another tip:  try not to stretch the tshirt as you sew.

Here's the second shirt:


I put the strip with the pokey halves of the snaps on the back of the shirt so the pokey parts are facing away from Garrit.  Just in case.

He's going to try out both shirts and tell me if he prefers the Velcro or the snaps.

Life in a cast is hard, and I'm just hoping these modified shirts help Garrit with one task in his day!

Jessica

Tuesday, July 26, 2016

The Lazy Way to Fix a Big Waistband

At the end of the season last summer, I bought some clearance swim suits/trunks for my kids.  There was one pair of swim trunks that Nolan wouldn't wear this year because the waistband was too big and they didn't have a drawstring or any way to adjust them.

I kept putting off fixing them because fixing them the "right" way seemed time-consuming.  So today I fixed them the lazy way!

I bought shoestrings that matched the swim trunks.  The only other supply I needed was some FrayCheck, which I always have in my sewing arsenal.


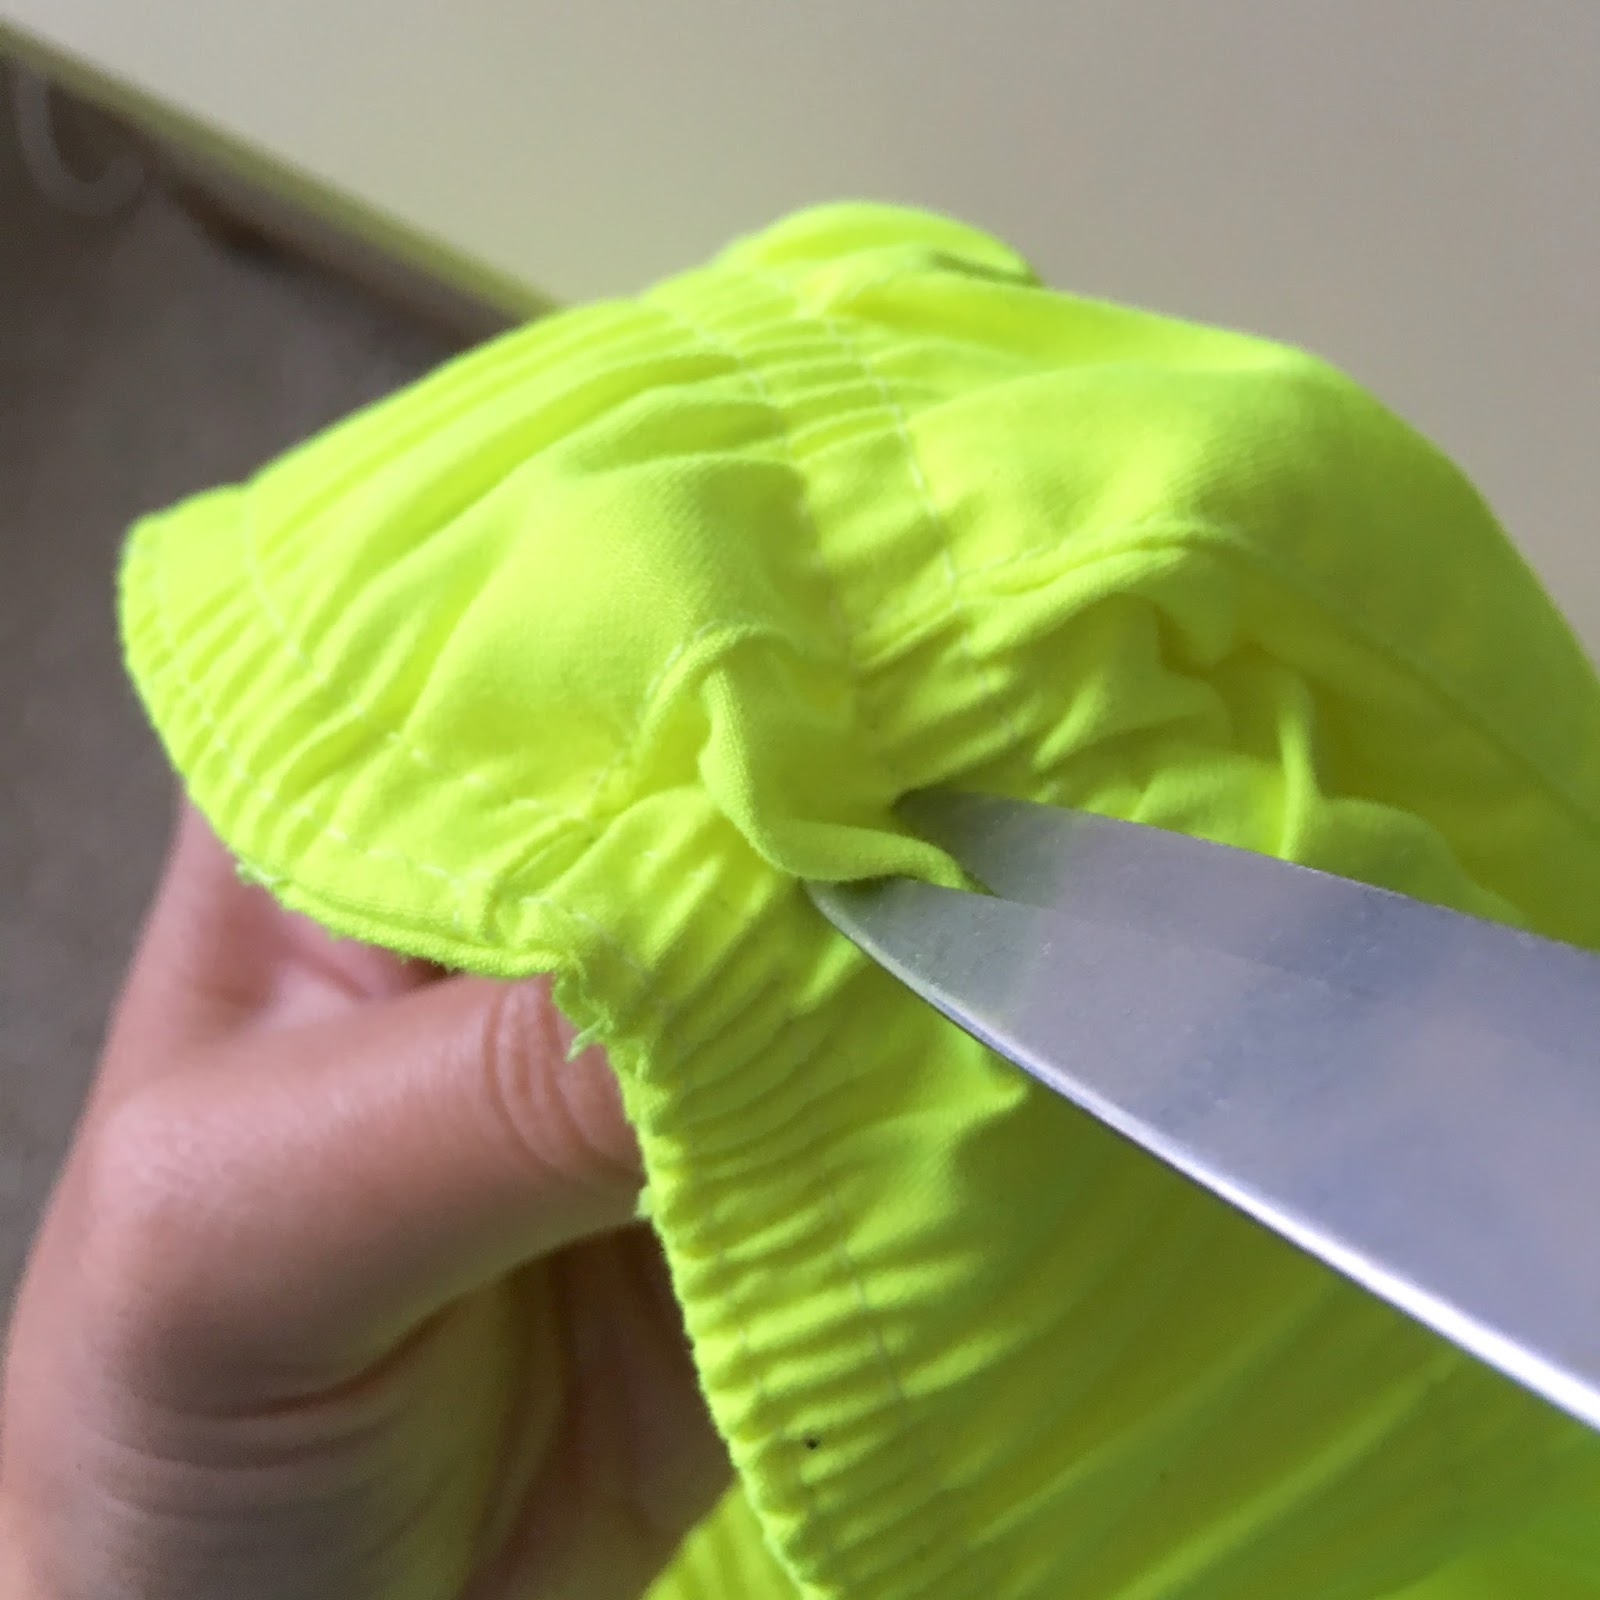
I needed to cut two openings in the waistband, one on each side of the front center.

I gathered up just the front layer of fabric and made a vertical cut.


I did the same on the other side of the front center.

It's hard to see but there's a cut near each of my fingers.
I coated the new openings with FrayCheck to keep them from, well, fraying.


Then I fed one end of the shoestring through one opening and pushed it through the waistband until it came out the other opening.


And they're done!


Now Nolan can tighten them and avoid any embarrassing swim situations.

P.S.  Neon yellow is hard to photograph!

Jessica

Monday, January 11, 2016

Today's Time: Badge Removal

I've said it before and I'll say it again:  sometimes it's really hard to explain where my time goes.

For example, let me tell you what I did with today's time.

I've been down for two days with the flu.  I'm talking down like I don't think I have the energy to get up and pee.  The problem is that I really don't just sit.  Or lay.  Ever.

So today I pulled out a project that could be done from a sitting/reclining position since that's all my flu-ridden body would allow me to do.  I've been working on this project on and off for a few months.

These are Caravan sashes and scarves:


What's Caravan, you ask?  It's a Christian-based scouting program that takes place at our church on Wednesday evenings during the school year.  Kids earn badges that are added to their sashes and scarves.

Those sashes and scarves and badges cost a lot of money for the church.  Another church donated two boxes of used sashes and scarves to our church.  So I was given the task of removing all the badges.

I'm stripping these babies for parts.

Roughly 30-40% of the donated items had current badges on them, and the rest have outdated badges that can no longer be used.  But we could really use the sashes and scarves once the outdated badges are removed.

Some of the badges were hand-sewn on.  More were machine-sewn on.  I can use my seam ripper to remove the stitching and ultimately the badges.  Then I have to pick all the little threads off the badges and sash/scarf.

Some of the badges were hot glued on.  These peel off fairly easily and leave behind a white-ish shadow where the glue was.  Other badges were applied with some sort of mystery adhesive.  Some of these leave behind a thin shiny layer.  Others require Hulk strength to pull off and leave behind a thick rubbery glue.


A few of the sashes had badges that had been safety pinned to them.  These just required time and diligence to not give myself tetanus.

It's slow going.  It makes all my fingertips bruised from pulling on every badge and thread.  It makes my fingernails rough and broken and split.


It also occasionally does this to my seam ripper:

If you are not a seamstress, you may not realize that this is missing two parts that snapped off.
I have to take a break until my fingers heal and I get a new seam ripper.  Then I'll tackle the remaining 19 scarves (yes I counted).

I now have a bag of badges that can be reused:


A bag of badges that can no longer be used:


And a stack of stripped sashes and scarves that need to somehow have the adhesive removed:


So...does anyone know how to remove mystery adhesive and hot glue residue from fabric?  If so, PLEASE leave me some advice in the comments!  I'll be asking the Google for help on this one, but I'd rather hear from actual people.  If I can't get these sashes and scarves clean in order to be passed on to kids in our church, then all my hard work (and sacrificed fingernails and seam rippers) will be for nothing!

Now my nighttime cold medicine is kicking in and my head is getting fuzzy.  Does that make anyone else think of Meg Ryan in You've Got Mail?  If so, we should be friends.  Or we probably already are.

Ok, time to lay back down.  And find something to do while I'm resting.

Jessica

Monday, September 1, 2014

Baby Colors Trend

I may be done having babies, but I still get to keep up with baby trends through all the people around me who are in need of baby showers, baby products, decorations, etc.

I noticed that the three baby projects I worked on most recently had some common threads.

First, I very happily just completed a project I've been working on for 2-3 months.  I made crib bumpers and a crib skirt for my college roommate Angela.  I love that we're still friends after all these years, and I love that I still get to be part of her growing family even though we are miles apart.

I'll just give you  a little peek of the finished crib bedding since I plan to write a blog post about it later.


The alligator fabric and green circle fabric with orange piping are the crib bumper pads.  The navy and white striped fabric with orange chevron fabric make up the crib skirt.

Angela chose the colors--navy, green, and orange.  She painted the baby's room aqua.

Angela is a perfectionist and extremely detail-oriented.  I actually love working with her on projects.  You may remember that I made her valance for her first son's room.

My two favorite types of "clients" to work with are (1) people who know exactly what they want and can clearly articulate it and (2) people who give general guidelines and then truly give me creative freedom.  Angela is the first type of client.  I can text her pictures or questions, and she can quickly choose between 5 orange ribbons or tell me how many stripes she wants in her fabric.  She doesn't have to be afraid to ask for exactly what she wants, and I don't have to agonize over decisions.

This was a very time-consuming project, and I can't wait to tell you and show you more!

The second baby project I've recently completed was making 72 cupcakes for the first birthday party of a little baby boy at church.  His mom contacted me a month or so before his birthday and gave me an inspiration photo for his party:


She wanted aqua, orange, green, and dark blue (as seen in the cupcake photo).  She requested two batches of chocolate cupcakes and one batch of vanilla (with matching frostings).  She asked me to make bowties and ones for the cupcake toppers.

I made my go-to marshmallow fondant and colored it with food coloring gel.  I made the cupcake toppers a couple days before the party so they could dry out to hold their shape.


The green had a few texture issues, and the dark blue was horrendous!  I don't know if I overworked them trying to get the colors right or what.  The aqua was smooth as a baby's bottom and also my favorite color in general.


To make the bowties, I read this tutorial on Make Fabulous Cakes.  Only I didn't add any polka dots and I made my ties with a single layer and I changed the dimensions.  So I suppose mine are loosely based on the aforementioned tutorial.

I hadn't been given any direction on what the mom wanted for the "1" cupcake toppers, so I decided to layer big circles, medium circles, and ones.  I cut out all the circles and ones of each color and let them dry on wax paper for 24 hours or so.  Then I layered them, using water to "glue" them together.


I baked the cupcakes the day before the party and kept them in my handy dandy cupcake containers that I got by begging the lady behind the bakery counter at Sam's Club when I made the graduation cupcakes.


On the morning of the party, I made the frostings, frosted the cupcakes, and added the decorative toppers.


The third baby project I've done lately is making decorations for a baby shower that a woman at church is hosting.  The theme is "Oh Baby!" since the couple doesn't know if they are having a boy or girl.  The woman hosting the shower chose orange and a darker aqua for the colors.  I didn't mention that these seem very much like boy colors to me.  She asked me to cut out letters for her to attach to a fabric bunting banner.  She chose the font and gave me the paper.


The letters above will each be adhered to a section of the banner, and the banner will be hung on the front of a table at the shower.

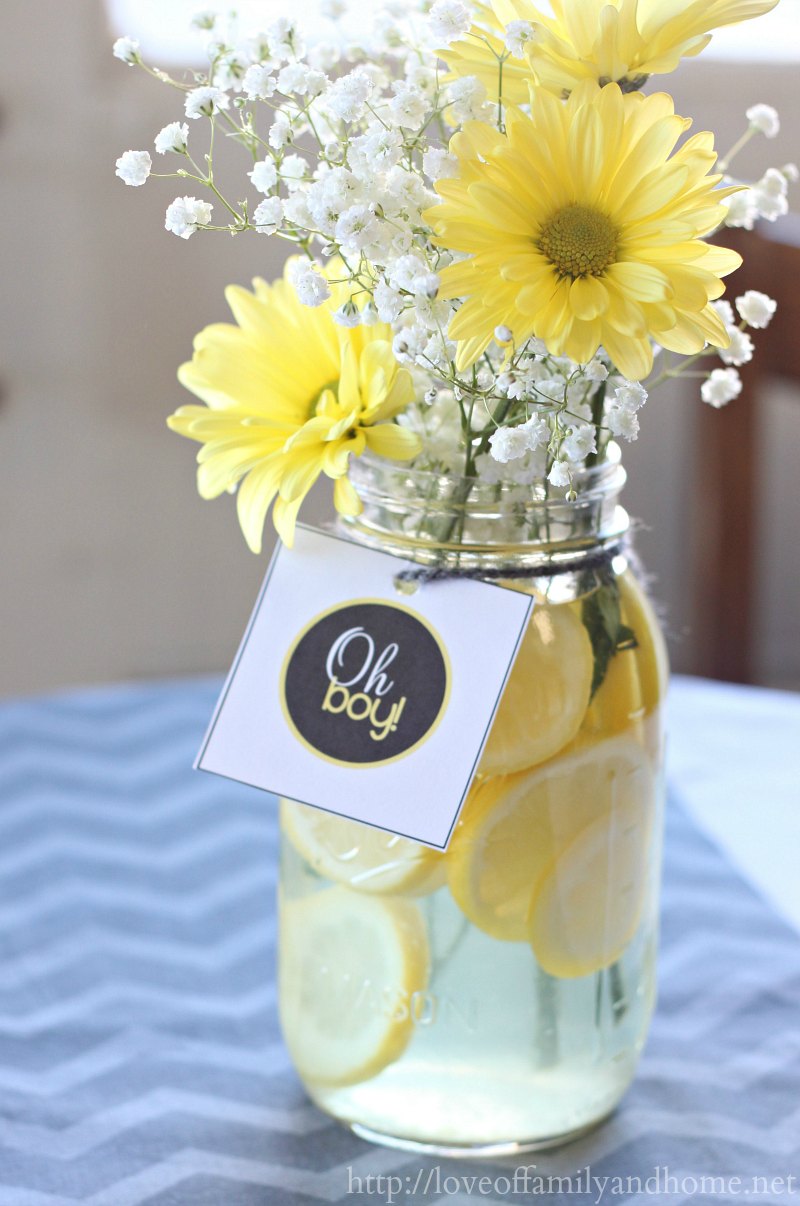
She sent me this inspiration picture:

From Love of Family and Home

She gave me a couple different papers and asked me to make something similar to the tags in the picture so she could put them on Mason jars for drinks at the baby shower.  Here's what I came up with:


Did you notice how similar all of the colors are for all of these baby projects?  Aqua and orange...aqua, orange, navy, and green...orange, navy, and green.  I think we have a new trend in baby colors!

Jessica