Friday, March 9, 2012

Random Acts of Kindness


Many of you know that this past Christmas I participated in RACK:  Random Acts of Christmas Kindness.  Several people from my Sunday school class also joined me in this project.  It was a lot of work and a lot of fun.  I have thought about how to incorporate these ideas into the rest of the year. 


Thanks to Moms by Heart, I discovered this great post about random acts of kindness, complete with free printable cards.  I hope you get inspired!

Jessica

Mornings

I have a love/hate relationship with mornings.  I mostly hate them.  But they do have this one redeeming quality:  they bring me the fragrance of my warm, sleepy children (the softest creatures ever made).

Those first few moments with each child are my favorite part of the day.  But then we have to move on in order to get ready in time to take Nolan to school.  I miss the days of doing mornings at our own pace.  Now we have a list of tasks to be completed and a deadline for their completion.

My snuggles, smooches, and smells turn into reminders and often barked orders.  Finish your breakfast.  Brush your teeth.  Get your shoes on.  Stop saying that made-up word that sounds 99% like a cuss word.

This morning I was in the bathroom doing my hair when I overheard a conversation between Nolan (5) and Griffin (4) at the kitchen table.  They were discussing the Cinnamon Toast Crunch box.  

         Griffin:  That's not Cinnamon Toast Crunch.
         Nolan:  Yes it is.  {quite annoyed} 
         Griffin:  It can't be because it starts with "c" and c says "ck."
         Nolan:  Well, c can also say "sss."  Trust me.  I've been in school for over 100 days.

That's just one sample of our morning.  There were other hilarious conversations, as well as frustrating conversations.  Griffin told me, chin quivering, that he doesn't want to get shots on his first day of kindergarten.  (He doesn't start kindergarten for another year, and I did explain that he gets his 5-year-old shots at the doctor and not at school.)

After all the eating, dressing, brushing teeth, packing the backpack, and loading into the car comes the most painful part of my morning.  We drive to Nolan's school, and I park near the car line but not quite in it.  Nolan gives his siblings a quick half-hearted hug and kiss.  Then he pokes his head between the front seats so I can kiss him and rub my cheek against his baby-soft cheek.  I have to breathe deep and soak up enough of him to last me for the day.

Then we drive up into the car line and pull up in front of the school.  I immediately feel the pressure of all the cars lined up behind us and I tell Nolan again that I love him and try to gently scoot him out of the car.  He always struggles to get the car door closed on the first try, and I try not to stress about the extra seconds it takes for him to try again.

I can't drive away until I've seen him walk into the school, so I pull up out of everyone else's way and watch Nolan saunter up to the school door and hold it open for anyone else who happens to be going in at the same time.  I notice how little he looks in front of the big school.  And I think about how wrong it feels to let my baby walk himself into the school and down the long hallway to his classroom.  Once he is out of sight, I drive away and try to gather myself and redirect my attention to Griffin and Nora.

This morning was chilly but very sunny.  Halfway between the car and the school, Nolan turned around to face me.  He poked his chubby little fingers up out of his oversized coat sleeve and waved the "I love you" wave at me.  The sunshine practically illuminated his round face as he sweetly smiled.  And I felt the familiar heartache that I feel every single morning as I watch him walk into school and I will my foot to drive the car away from my child.      

I thought this was supposed to get easier.  After all, he has been in school for over 100 days.  But it still rips my heart out every time I drop him off and trust strangers to care for him and protect him.  I know this is just the tip of the heartache iceberg.  I know this is nothing compared to what's to come.  Dating.  College.  Marriage.  

For now I'm just so glad that he's young enough that he wants me to put a note in his lunch everyday, and he doesn't care if anyone sees the loving things I say to him.  He is not ashamed to wave the "I love you" wave in front of the whole car line.  And he doesn't mind that I nuzzle and smell him every single morning when he wakes up.

Wednesday, March 7, 2012

Two Birds, One Stone

Sometimes my house is so disgusting that it makes me crabby.  But even at those times, it's hard to find the time and energy to clean.  Especially while I'm overloaded making Easter Genies.

Another thing I've been neglecting:  my hands.  My hands are so stinking dry that they are also annoying me.  I wash them about a trillion times per day, and I only lotion them at night right before I go to bed.

So, I decided to try to knock out these two {annoying} birds with one stone.

I slathered on some Aquaphor and Eucerin (yes, at the same time) on my hands and then slipped on my cleaning gloves.  They're just the basic yellow latex gloves.  Then I tackled our disgusting bathroom.  Pandora kept me company while I cleaned.

After about 30 minutes, I had a sparkling clean bathroom and soft hands!  I'm sure I'm not the first person to think of this trick, but it might come in handy if you haven't tried it.

When I cleaned my gloves and put them away {yes, I clean my cleaning gloves...like Monica cleaning her vacuum on Friends}, I looked at just how ugly they are.  I know I've heard of cute cleaning gloves, so I (of course), hopped on Google.

I found some super cute cleaning gloves!  They are available on several websites.  Here are my favorites:


Now I'm torn between purchasing one of these adorable options and that constant constant thought that holds me back:  I could make those myself.

We'll see what I end up doing.  For now, since it's been a full 24 hours since I tackled the bathroom, it's time to clean again.
Jessica

Tuesday, March 6, 2012

Blog Spotlight: Lil Blue Boo

I love to read craft blogs.  I get so inspired when I see what other people are making.  I have approximately 9,000 tutorials bookmarked as projects/techniques I would like to try.  I have another 3,000 blogs bookmarked as sites that I love to visit.

Lil Blue Boo is one of those bookmarked blogs.  

I have visited this site, run by the beautiful Ashley, many times over the last couple of years because she has fantastic tutorials and really cool projects.
Ashley, Lil Blue Boo Editor/Designer/DIYer

Last year proved to be an extremely tough year for Ashley.  She suffered a miscarriage, her father passed away unexpectedly, and then what she thought was another pregnancy turned out to be nasty uterus-eating cancer.  After she nearly died on the operating table while doctors performed an emergency hysterectomy, she had to jump right into chemotherapy.  

And in the midst of all that, do you know what her motto is?


That's right.  Her motto is "Choose Joy."  Click here to read her awesome post about choosing joy.

I have spent hours reading Ashley's incredible posts on Lil Blue Boo.  I get that super-concentration look on my face (and occasionally tear up), and my husband will say, "You're on that cancer blog, aren't you?"  I always defensively reply, "Yes, and she would not appreciate you calling it that."

I encourage you to watch Ashley's Rite of Passage video.  But have a box of tissues nearby.  I full-out ugly cried when I watched it.  Not because she was sad.  Because she was so strong.

And while you're on Lil Blue Boo, check out some of her fantastic tutorials.  Ashley is one of those women who accomplishes so much in a single day that I can't figure out how it's even possible, even if she never slept.

Oh, and did I mention she has her own clothing line??  The spring line of Lil Blue Boo was just released.  I need this outfit for my daughter:
I hope you enjoy exploring Lil Blue Boo as much as I do!

Jessica

Monday, March 5, 2012

Current Project: Easter Genie

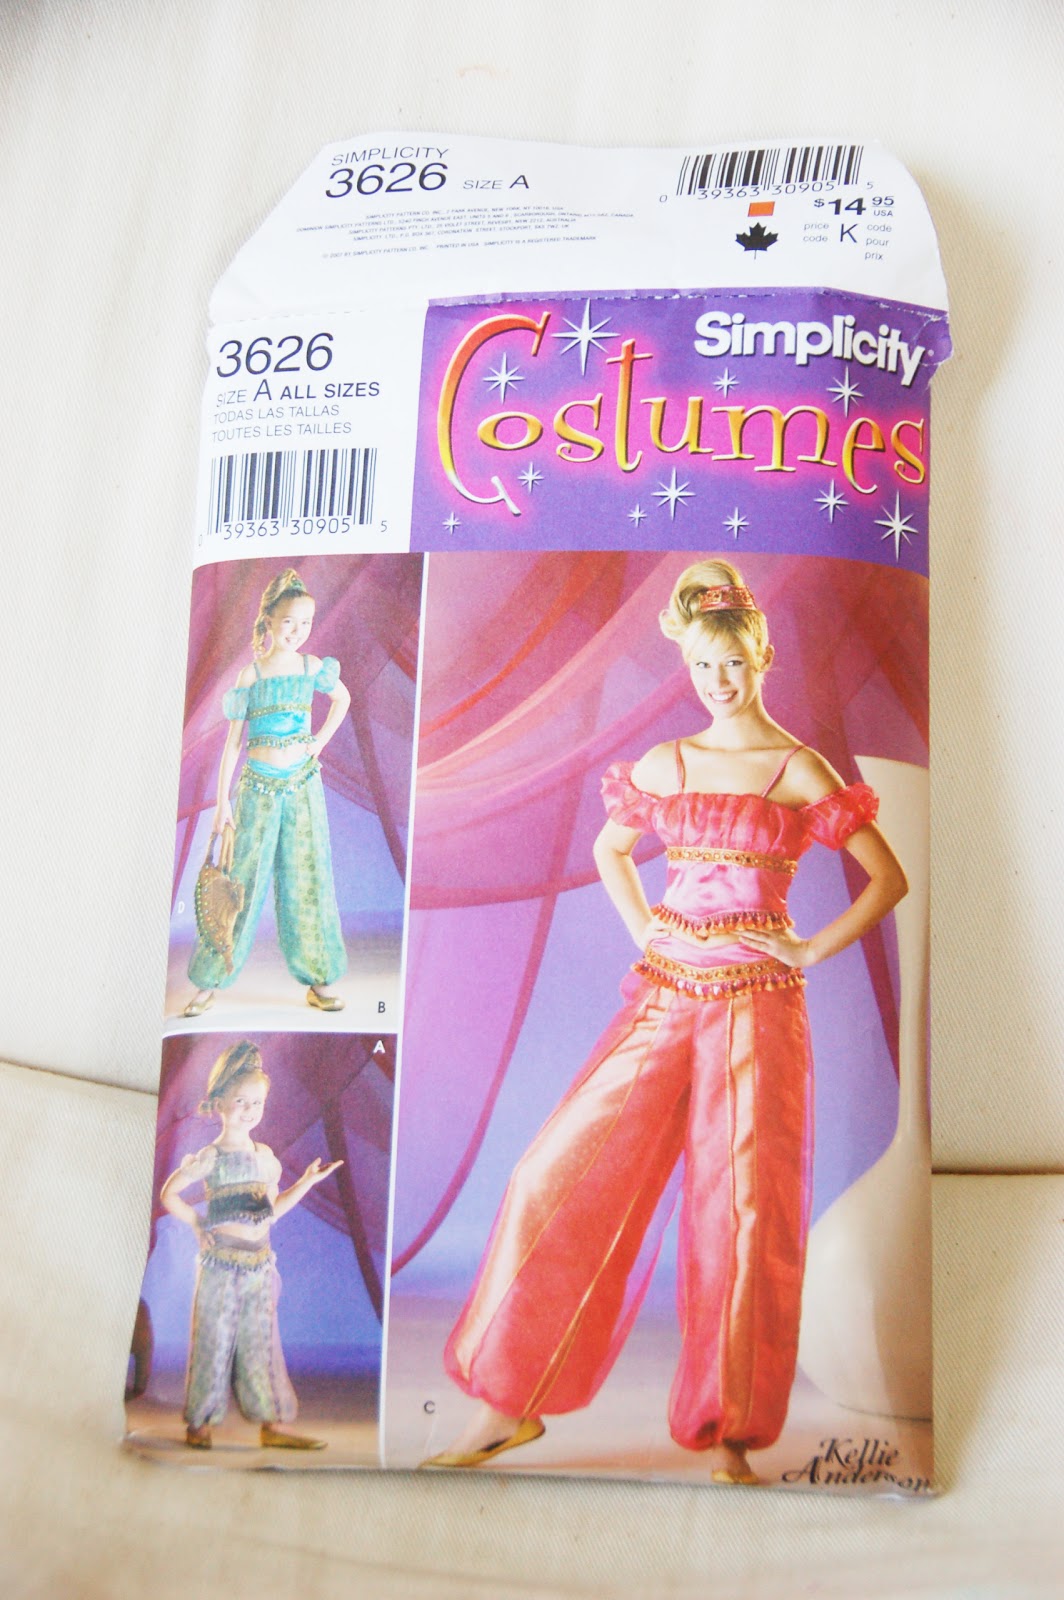
My current project is one of the most challenging sewing endeavors I have ever taken on.  I am making 3 costumes for my church's Easter play, called the Passion Play.  

I've been working for just over two weeks, and I'm about 60% done with costume #1.  Here's the pattern:
Oh, you don't remember a genie in the Easter story?  Well, I'm actually sewing costumes for three women who will be playing Herod's harem. 

This is a challenging task for so many reasons:
  • The pattern is not the correct size for my actors, so I spent one week adjusting each and every individual pattern piece (20 pieces) to add to all sides of each piece.  
  • The fabrics are super silky and slippery, making them difficult to cut out and difficult to sew.
  • The fabrics cannot be ironed the same as cotton fabrics.
  • The fabrics show pin holes sometimes, so I have to be very careful how I pin them.
  • I have to somehow make this costume "church appropriate."  (cover the belly, make the straps wider, etc.)
  • This is one of the most challenging patterns I have ever attempted, even if I wasn't adjusting the size and style as I go.
  • This outfit is very fitted in most places, so I have to get all the measurements correct or it won't fit properly and is not easily adjusted.
  • The costume is fully lined, which basically means it's twice as much work.
I have been working on this project every single day whenever possible.  I get the Mom of the Year award for letting my kids watch TV so I can work on my sewing.  I also work on it every evening after they are in bed.  I have already sacrificed their nap time for the sake of exercising {yuck}.

So let me show you what I've done so far.

First, I compared the actor's measurements with the pattern measurements to figure out how much I needed to add to each part of the costume.  This required math, drawings, a lot of erasing, taping extra paper to each pattern piece, measuring, marking, cutting, and wishing I could curse.

Here's just one of the 20 pattern pieces that I adjusted:
You can see that I had to distribute the extra width on all sides of the pattern piece so I could keep the general shape of it.

In addition to adding size, I also had to change some of the style.  For example, I added length to the bodice so it would cover the actress' belly.  Also notice that the top of the pants is a V shape, which reveals her belly button.  So I adjusted that part of the pants to be taller and straight across.  These are the pieces that will become the top of the pants:

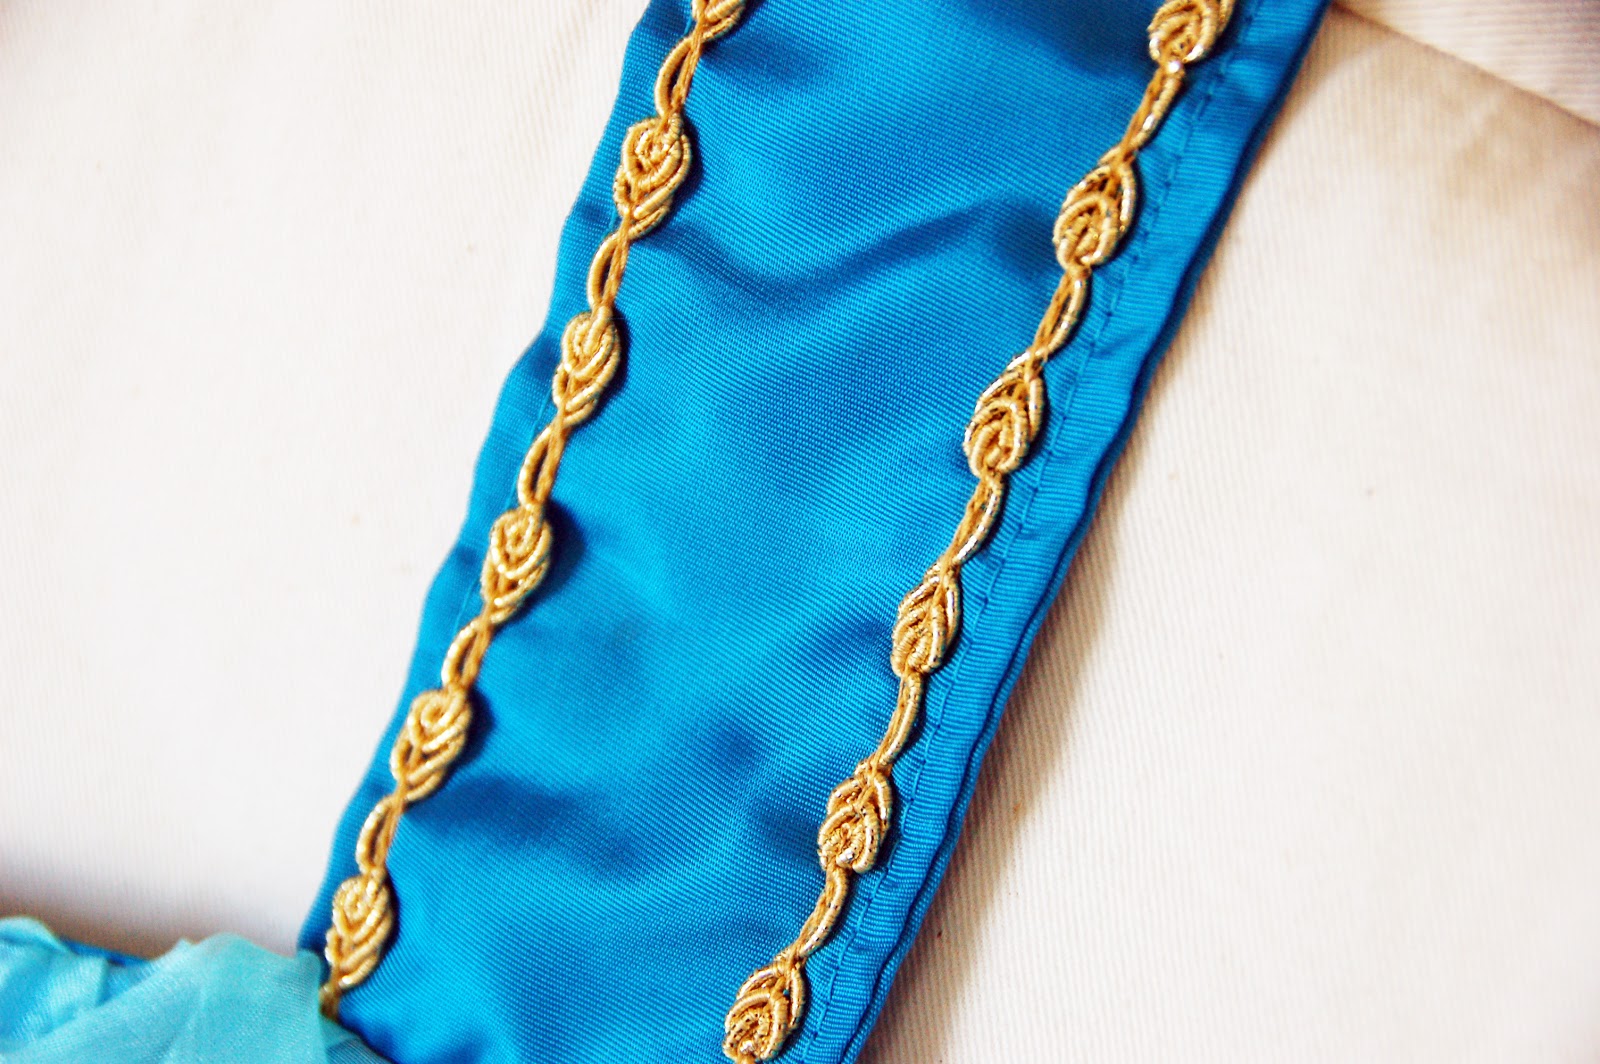
I have done as much work on the costume top as I can for now.  Next I need to fit it to the actual girl who will be wearing it so I can adjust the strap length and add the back closure so it fits snugly (you know, "church" snug).  Here's what the top looks like now:
 
I made the straps extra wide, which meant that I had to add the trim to each side rather than down the middle as the pattern instructed.

The top of the bodice consists of the darker blue silk that's very fitted, complete with darts for the bust shape.  Then there's an overlay of gathered aqua sheer fabric.  Gathering that stinking sheer, slippery fabric was a monumental task.  

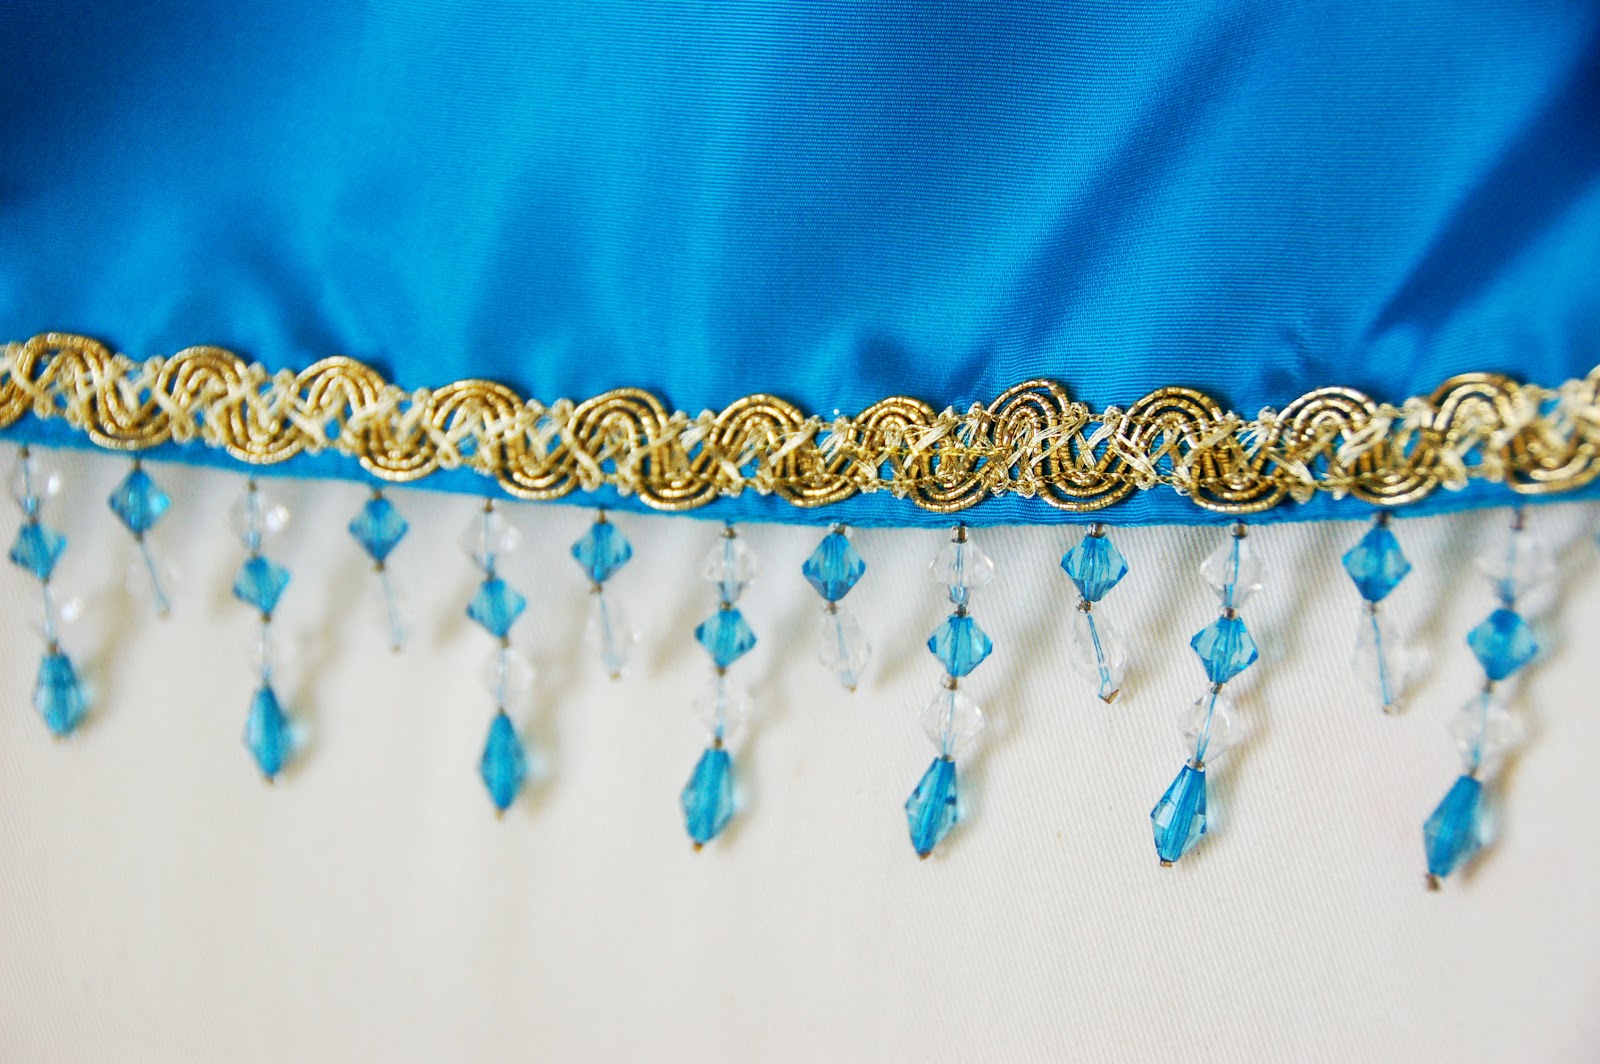
The bottom part of the bodice is just the darker blue silk with decorative beaded trim and gold metallic braided trim.  I sandwiched the beaded trim between the main fabric and the lining so the beading would hang down.  Then I added the gold trim and machine sewed it in place, which was a new and not exciting experience.  

When I got to the point of joining the bodice bust (the part with the gathered overlay) and the bodice bottom (with the fancy trim), they were not the same size.  Sigh.

The bottom portion was bigger, so I just added two small pleats in the front and two small pleats in the back.  I hope I'm not making this poor girl look pregnant because I miscalculated my measurements. 

I also hope that it fits her well because it is fully lined and will therefore be difficult to adjust at this point.  Here's a shot of the inside of the top:
You can see the darts in the top, the pleats just below the bust line, and where I was able to use my serger to finish off the seam in the middle there (just below the bust).  I only have black thread and white thread for my serger currently, and it was already threaded with black.  Since I didn't have three hours to rethread it, I just went with the black.  

How nice to have a serger though!  These fabrics unravel terribly.  My husband is constantly picking blue threads off my clothes.  I find them all throughout my house.  Serging the exposed seams makes a huge difference, and this is only the second project I've ever used my serger for!

The little sleeves were more time-consuming than you might think.  Each top and bottom had to be turned under twice and pressed (fold, measure, iron, fold, measure, iron, fold...).  Then I sewed each side to form a casing for the elastic.  I've never run into this problem before, but since the fabric is sheer, you can see the elastic.  I only had white elastic, so I used an aqua fabric marker to color the elastic.  Just trying to think on my feet here.


Yesterday I reached the point I have been dreading.  The overlays on the pants.  If you look at the pattern again, you'll see that the pants have long strips of sheer fabric laying over the silk pants.  There are 8 long panels to be exact.  I have to take each panel to my ironing board {prison cell}.  For each long edge, I have to fold it over, measuring as I go, and press.  Then fold it again, measuring as I go, and press.  So twice on each long edge...two long edges per panel...eight panels total...that's 32 times that I have to fold, measure, and press.

And did I mention that as I fold the slippery fabric over, it stretches and warps and I can't figure out if I'm folding over the correct measurement?  {insert hideous face here}

Once the edges are pressed, they have to be sewn in place.  Once they're sewn in place, I have to sew gold metallic ric rac near the seam.  Last night I finished 4 of the 8 panels.

I can't count how many times I have said, "No one will ever know how long this takes or how much work went into this."  

My encouragement through this project has been Colossians 3:23-24.
23 Whatever you do, work at it with all your heart, as working for the Lord, not for men, 24 since you know that you will receive an inheritance from the Lord as a reward. It is the Lord Christ you are serving.
After all my whining, I'm thinking maybe I should focus on Philippians 2:14-16.
 14 Do everything without grumbling or arguing, 15 so that you may become blameless and pure, “children of God without fault in a warped and crooked generation.” Then you will shine among them like stars in the sky 16 as you hold firmly to the word of life. And then I will be able to boast on the day of Christ that I did not run or labor in vain.
It's a privilege to help the talented people of my church put on a play to tell our community what Jesus did for all of us.  I can't act or sing.  But if I can spend weeks working my hiney off in order to create costumes that will be seen for maybe 90 seconds on people who don't even have speaking parts, well then I need to offer up my skills as a sacrifice to my Lord. 

I have a choice of working to please people or please God.  I often unknowingly make the choice to try to earn the approval of people around me.  Now that I'm aware of the choice before me, I know which way I'm choosing.

Jessica

Saturday, March 3, 2012

Diet Foods: Meals

This will be the longest of the diet food posts because there are so many options for lunches and diners.  Some of these are main course items, and many are side dishes.

I love using ground turkey breast in place of hamburger.  I use it for spaghetti, goulash, even pizza toppings.  Just be careful when you choose your ground turkey because some options have about the same amount of fat as ground beef.  Be sure it says something like 97% Fat Free or turkey breast (not just ground turkey).  The packages I buy contain 4 servings, so I usually brown it all at once and then divide it up.  I use one serving right away and put the other three away in the fridge for use later in the week.

I think most people probably know that chicken breasts are a nice lean meat.  I like them grilled for delicious flavor.  Since it's still cold and gross here, I have to bake them or cook them in a skillet. 

Tuna is another great meat option.  One can of tuna is usually 2 servings, but you can eat the whole can without feeling guilty.  I like to mix it with one tablespoon of Kraft Miracle Whip Light (which I think is every bit as good as the full-fat version):

I eat my tuna with Reduced Fat Wheat Thins (16 crackers for one serving) and call it a lunch:


If you like fish, I suggest you try Schwan's Breaded Blue Hake:

I ordered these after I had a random craving for a McDonald's fish sandwich, which I knew was off limits.  These are a Live Smart (diet) item, and they are crunchy and delicious out of the oven.  

If you don't order Schwan's food then you can probably find frozen Tilapia fillets (I find them at both Kroger and at Walmart).  Tilapia is a light fish and very lean.  We like it with lemon pepper sprinkled on top before we bake it.  

My last meat suggestion might seem gross to some of you.  I grew up eating cold hot dogs and still enjoy them (warm or cold!) today.  My favorites are Oscar Mayer 98% Fat Free Weiners (made with turkey).
Sometimes I eat these hot dogs plain, wrapped in a tortilla with some (diet) cheese, or even sliced and placed on top of my diet pizza (recipe to follow).

I really like Thomas 100% Whole Wheat Bagel Thins:
These make great sandwiches, egg sandwiches, or even pizzas.  I lay one bagel open, distribute 1/4 cup pizza or spaghetti sauce evenly between the two halves (be careful...sauces can have a surprising amount of calories!), sprinkle 1/4 cup fat-free shredded cheese on each half, and sprinkle browned ground turkey or sliced hot dog on top.  Place the two mini pizzas on a baking sheet and bake at 425 degrees for 10 minutes.  Yum!

I have been substituting Kraft Fat-Free Shredded Cheddar for regular cheese in several recipes.  I also use the mozzarella version.

When I make pasta dishes for my family, I make mine using whole wheat pasta.  I use several brands of wheat pasta and like them all.  I use the rotini and penne all the time.  Be sure to measure your pasta to ensure you're sticking to the serving size.

Another swap I've made is substituting brown rice for white rice.  And guess what...my kids love it!  It has a great texture, and we like the flavor with just salt and pepper on it.  I use Minute Brown Rice because it cooks quickly and in the microwave.  The box lists cooking instructions for 2 servings, so I just cut the rice and water amounts in half for 1 serving for myself (and cut cooking time in half).


 In addition to these wheat products that I love, I have been hunting for a good wheat tortilla.  My husband and I have compared nutrition facts until we were cross-eyed.  There are SO many options in the tortilla department, and most of them are tricky.  They can be low in carbs but still high in calories or fat.  We finally found the very best choice.  Learn from me and just go straight for Ole Xtreme Wellness High Fiber Low Carb Tortillas.  In our grocery store, these are near the bread (not in the refrigerated section). 
 Compare the nutrition facts on these to other tortillas, and you'll be amazed.  Plus they taste great!  These can be used for breakfast burritos (with my 1 egg & 2 egg whites combo and chicken bacon), chicken wraps, etc.


I know this is a long post, but I figure someone should benefit from all of my time spent comparing products and searching for new go-to foods.  Hopefully some of these will make their way onto your table.

Jessica

Here are links to nutrition information for products discussed here:
*Of course, you can always just pull up the nutrition info in your Spark People app!

Thursday, March 1, 2012

Shoe Re-do


Several years ago, I bought these shoes.  I'm a sucker for flats with a cute pattern.  These are covered with satin fabric in a black and ivory print. 

I wore these shoes countless times over the last 4+ years, and the ivory portions became quite dingy.  Exhibit A:

They were far too gross to wear anymore, but since I was going to throw them out anyway, I decided to do a little experiment.  I thought since the uppers are made of fabric, maybe I could use a fabric marker to color in the ivory patterns.  I did a couple little test spots with a Crayola Fabric Marker:


The red was a little too orangey for me.  And it wasn't very dark.  So I went to Hobby Lobby and bought a FabricMate red fabric marker.  It had a big chisel tip, so the coloring went faster.  Plus the red was deeper and less orange.

{Ew.  The insides of the shoes were soooo dusty.  Wish I would have thought to clean them before I took all the pictures.}

I just sat and colored in all the designs while the kiddos were napping.  I was semi-careful about staying in the ivory areas, even though the red wasn't visible on the black parts.  

While I was at Hobby Lobby, I did pick up a black fabric marker just in case this experiment didn't work and the shoes needed to become solid black flats. :)

Here's my "new" pair of shoes:


I have worn these shoes out and about a couple times, and they still look new.  I'm just excited that I didn't have to throw them away!

*I know these pictures could be much better.  I still haven't learned how to take great photos.  My sister is a brilliant photographer and has tried to coach me, but apparently her teaching doesn't stick.  Plus the fabric on the shoes is a tad shiny, which made them difficult to photograph.  I hope you can still get the idea!

Jessica